
When wiring aftermarket lights, make sure you ground all connections to a single, solid point to prevent ground loops and flickering. Use relays to handle high current loads directly from the battery, keeping switches and wiring safe from heat damage. Install a fuse close to the power source with an appropriate amperage rating for safety. Secure all connections tightly with insulation to avoid shorts and intermittent operation. Keep these basics in mind—you’ll find out more on how to do it right.
Key Takeaways
- Use relays to switch high current loads directly from the battery, keeping wiring safe and reducing switch load.
- Install a fuse close to the power source, selecting a rating slightly above the lights’ maximum current to protect against shorts.
- Ground all lights to a single, solid point to prevent ground loops, flickering, and electrical damage.
- Ensure all connections are tight, insulated, and secure with quality tape or heat shrink tubing to prevent shorts and flickering.
- Manage power draw by verifying manufacturer specs and properly sizing wiring and fuses to avoid overheating and damage.
Wiring aftermarket lights can seem intimidating, but with the right approach, it’s a manageable task that enhances your vehicle’s appearance and functionality. One of the most important aspects to contemplate is ensuring your setup is safe and reliable, which means understanding how to prevent issues like ground loops and managing power draw effectively. Ground loops occur when there’s more than one ground path for the electrical current, causing unwanted current flow that can lead to flickering lights or damage over time. To avoid this, you should connect all your lights to a single, solid ground point instead of multiple grounding spots scattered across the vehicle. This keeps the electrical flow consistent and minimizes the risk of ground loop problems.
Prevent ground loops by connecting all lights to a single, solid ground point for reliable, flicker-free operation.
Power draw is another critical factor. Aftermarket lights, especially high-powered LED or HID units, can draw a significant amount of current, which might strain your vehicle’s wiring if not managed properly. To prevent wiring from overheating or blowing fuses, always check the manufacturer’s specifications for maximum current and ensure your wiring and fuse choices can handle this load. Using a relay is essential here; it allows you to switch the high current load directly from the battery, protecting your switch and wiring from excess heat and damage. When wiring your lights through a relay, remember to connect the relay’s coil to your switch so you can control the lights without running large wires through your cab, reducing clutter and risk.
Fuses are your safety net. Installing a fuse close to the power source protects your wiring and vehicle from short circuits or sudden power surges. Choose a fuse with the correct amperage rating, ideally slightly above the maximum current your lights will draw, but not so high that it bypasses safety in a short circuit. When wiring, always route the power cable through the fuse before connecting it to the relay and lights. This way, if something goes wrong, the fuse will blow before damage occurs to your vehicle’s wiring or electrical system.
Finally, make sure all your connections are secure and insulated with quality electrical tape or heat shrink tubing. Loose connections can cause flickering or intermittent operation, and exposed wires increase the risk of shorts. Take your time to double-check each connection, ensuring everything is tight and well-insulated. With proper grounding, adequate wiring gauge, and the right use of relays and fuses, you’ll have a safe, reliable aftermarket lighting setup that looks great and performs well, all without risking damage to your vehicle’s electrical system.
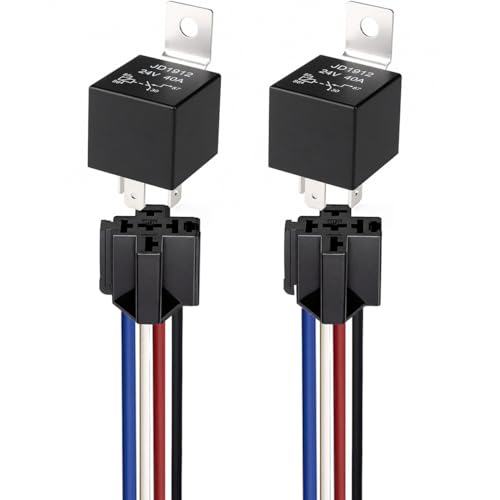
Gebildet 2pcs 12V 40A 4 Pin SPST Car Relay Harness JD1912, 12AWG Harness Sockets with Built-in Diode for Automotive Truck Van Boat Motorcycle
Integrated Diode: Each relay includes a built-in diode that suppresses induced voltage during switching, safeguarding your electrical components…
As an affiliate, we earn on qualifying purchases.
As an affiliate, we earn on qualifying purchases.
Frequently Asked Questions
Can Aftermarket Lights Be Installed Without Professional Help?
Yes, you can install aftermarket lights yourself, but you need to prioritize installation safety and legal considerations. Make sure you follow proper wiring procedures, use the right relays and fuses, and avoid damaging existing wiring. Check your local laws to ensure compliance with regulations on aftermarket lighting. If you’re unsure or uncomfortable, consulting a professional helps prevent issues and guarantees your installation is safe, legal, and reliable.
What Tools Are Needed for Wiring Aftermarket Lights?
To wire aftermarket lights, you’ll need a few essential tools. Grab wire strippers to remove insulation from your wires, ensuring clean connections. Crimping tools are vital for securing connectors tightly. Additionally, have a multimeter to check circuits, a screwdriver for mounting, and electrical tape or heat shrink tubing for insulation. These tools make the wiring process safer and more efficient, helping you achieve a professional-looking installation.
How Do I Troubleshoot if My Aftermarket Lights Don’t Turn On?
It can be frustrating when your lights don’t shine as expected. First, check for power supply issues—ensure your switch and fuse are working properly. Next, inspect wiring connection errors; look for loose or disconnected wires. Use a multimeter to test voltage at the light and relay points. Recheck all connections carefully, and if needed, consult your wiring diagram to confirm everything’s correctly set up.
Are There Legal Restrictions for Aftermarket Lights in Certain Areas?
You should check your local regulations to see if there are legal restrictions on aftermarket lights in your area. Some regions limit brightness, color, or placement to ensure safety and compliance. Always research your area’s laws before installing new lights, as violating local regulations could result in fines or vehicle inspection issues. Staying informed helps you stay aware of your upgrades without risking legal trouble.
How Long Does a Typical Aftermarket Lighting Installation Take?
A typical aftermarket lighting installation takes about 2 to 4 hours, depending on the installation complexity. If you’re familiar with wiring and have all the parts ready, the process goes quicker. However, if the setup involves complicated wiring or custom mounting, it might take longer. Planning ahead and having the right tools can help streamline the installation timeline, ensuring you get your lights working safely and efficiently.

ZIPCCI 80 Pcs Standard Car Fuse, Fuses Assortment kit(1A/3A/5A/10A/15A/20A/30A/40A) Automotive Blade Fuse for RV, Truck, Marine, Auto Accessories
Easy Identification: The fuse assortment kit is made of high-quality zinc alloy, featuring a transparent cover and color-coded…
As an affiliate, we earn on qualifying purchases.
As an affiliate, we earn on qualifying purchases.
Conclusion
Think of your aftermarket lights as guiding stars on your journey—when wired right, they illuminate your path safely and reliably. Using relays, fuses, and proper connections is like tending a garden, nurturing each element to shine bright without risking damage. Remember, safety isn’t just a rule; it’s the compass that keeps you moving forward. With careful wiring, your adventure stays bright, clear, and free of shadows, guiding you confidently through every mile.

PATIKIL Bare Copper Ground Wire, 18 Gauge 15 Feet Solid Braided Copper Cables Electronic Wire Grounding Conductor Stranded Metallic Wire for Lamp Electrical Equipment
Color: Bronze, Material: Copper, Wire Gauge: 18 AWG, Wire Diameter: 1.2 mm/0.05 inch, Wire Length: 4.6 m/15 ft,…
As an affiliate, we earn on qualifying purchases.
As an affiliate, we earn on qualifying purchases.

Nilight – NI -WA 06 LED Light Bar Wiring Harness Kit – 2 Leads 12V On Off Switch Power Relay Blade Fuse for Off Road Lights LED Work Light, 2 Years Warranty
Universal fit: Compatible with all automobiles, boats and devices equipped with a 12 volt power source
As an affiliate, we earn on qualifying purchases.
As an affiliate, we earn on qualifying purchases.