Adding a backup camera to your car is a straightforward DIY project. Start by selecting a camera with the right resolution, viewing angle, and features suitable for your vehicle. Gather tools like screwdrivers, wire cutters, and cables. Prepare your car by clearing space and planning cable routes. Mount the camera securely near the license plate or bumper, then connect its wiring to a power source and display. Proper setup and calibration guarantee clear visuals and safety—plus, you’ll find detailed steps stay ahead with each part of the installation.
Key Takeaways
- Select a suitable backup camera with appropriate resolution and viewing angle for your vehicle’s needs.
- Prepare the vehicle by clearing space, removing panels, and planning wiring routes for easy installation.
- Mount the camera securely near the license plate or bumper, ensuring a clear, unobstructed view.
- Connect the camera to a power source, typically the reverse light circuit, and route cables neatly to the display unit.
- Adjust and calibrate the system for optimal view, then secure the display and perform regular maintenance for clear visuals.

4K+4K Dash Cam Front and Rear, STARVIS SensorsFree 64GB Card,Support 256GB Max,5.8GHz WiFi Dash Camera for Cars,140°Wide Angle,3" IPS Screen, Dash Camera for Cars with 24/7 Parking Mode
【4K+4K Dual Recording 】G356-1 dash cam captures your drive journey in stunning 4K UHD resolution with STARVIS sensor...
As an affiliate, we earn on qualifying purchases.
Selecting the Right Backup Camera for Your Vehicle
Choosing the right backup camera for your vehicle starts with understanding your specific needs and the features that matter most to you. Focus on camera resolution, as a higher resolution provides a clearer, more detailed image, making it easier to see obstacles. Consider the viewing angle; a wider angle covers more area behind your vehicle, reducing blind spots. If you frequently park in tight spaces, a broader viewing angle is beneficial. On the other hand, if you want detailed images, prioritize a higher resolution camera. Think about your typical driving environment and how much clarity and coverage you’ll need. By evaluating these factors, you can select a backup camera that offers the best combination of resolution and viewing angle for safe, confident reversing. Additionally, understanding the mechanics of camera technology can help you choose a system that integrates seamlessly with your vehicle’s existing setup. Knowing how different sensor types function can also assist in selecting a camera that performs well in various lighting conditions, especially in low-light environments, ensuring visibility during night-time or adverse weather conditions. Moreover, considering installation complexity is important to ensure the system can be set up properly without extensive modifications, and being aware of adjustable features can help in customizing the camera’s performance to your preferences.

360 View 4 Channel Dash Cam Front and Rear Left Right Inside Camera for Cars, GPS and 5G Band WiFi, Night Vision, 160 Wide Angle, WDR, 24H Parking Mode, Supercapacitor, Included 128GB Card
4-Channel Dash Cam for Complete Vehicle Coverage: This dash cam is equipped with four Full HD 1080P cameras,...
As an affiliate, we earn on qualifying purchases.
Gathering the Necessary Tools and Materials
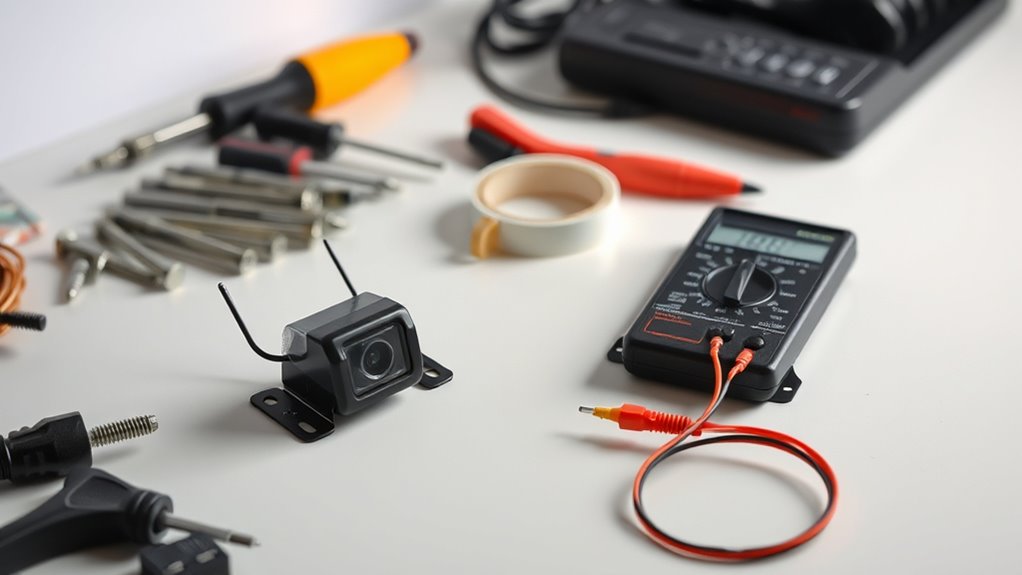
Before you begin installing your backup camera, it’s vital to gather all the necessary tools and materials to guarantee a smooth process. You’ll need basic hand tools like screwdrivers, a drill, and wire cutters. If you’re opting for wireless options, make sure you have the compatible transmitter and receiver ready. A multimeter is essential for tool calibration and verifying electrical connections. Additionally, gather the camera itself, mounting brackets, and wiring kits. For a cleaner look, consider zip ties and electrical tape. Don’t forget a drill bit set for mounting and a smartphone or camera app if your system supports calibration via Bluetooth or Wi-Fi. Having everything on hand minimizes interruptions and streamlines your installation. Proper preparation ensures a more efficient, trouble-free setup. Incorporating knowledge about Free Floating can also help you understand how to optimize your vehicle’s wiring layout for a cleaner installation, especially when considering vehicle wiring best practices. Understanding Paint Sprayer Zone concepts can help you plan your wiring route to avoid interference with existing paint or coating systems in your vehicle. Additionally, reviewing Gold IRA markets can provide insights into securing your investments, similar to how thorough planning benefits your installation process. Taking the time to research automotive wiring techniques can further enhance your ability to create a safe and reliable connection.
E-YEEGER Dash Cam Front and Rear, 2.5K Dual Dash Camera for Cars, 2560P Mini Car Camera, 2 inch IPS Screen, WDR Night Vision, 24 Hours Parking Monitor, G-Sensor, Support 256 GB Max
【2.5K Front + 1080P Rear Recording】S60 records 2560×1440P front video and 1080P rear video to help capture what...
As an affiliate, we earn on qualifying purchases.
Preparing Your Vehicle for Installation

To guarantee a smooth installation, you should start by preparing your vehicle properly. Clear out your vehicle interior around the area where you’ll install the camera to give yourself space to work. Remove any unnecessary items that could obstruct access or cause damage. Check the dashboard and rear area to ensure there’s a clear line of sight for the camera angle you want to achieve. If your vehicle has panels or trim that need removal, do this carefully and keep track of screws and clips. This preparation makes mounting and cable routing easier, reducing the risk of mistakes. Taking these steps helps ensure your backup camera is positioned correctly for maximum visibility and avoids unnecessary rework later. Understanding the importance of vehicle setup can significantly improve your installation process. Additionally, considering field‑of‑view and proper camera positioning during setup ensures optimal coverage of blind spots. Paying attention to these installation considerations can save you time and ensure a reliable, effective backup camera system. Also, ensuring proper power supply access during setup will prevent issues with camera operation later.
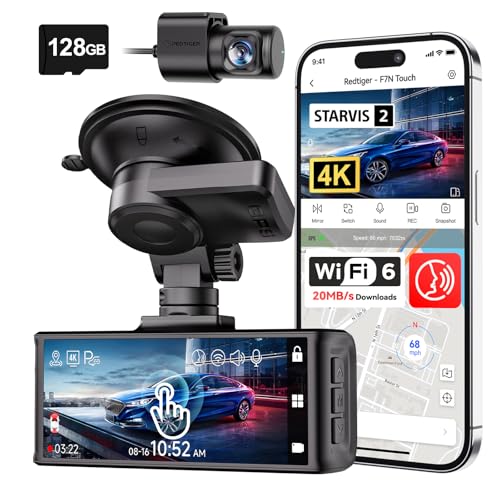
REDTIGER 4K STARVIS 2 Dash Cam Front and Rear, 5GHz WiFi 20MB/s Download, 128GB Card Included, Voice Control, Dash Camera for Cars with 3.18" Touch Screen, GPS, Loop Recording, Parking Mode(F7N Touch)
[4K+1080P Dual Recording] REDTIGER F7N TOUCH captures your drive journey in stunning 4K UHD resolution with STARVIS 2...
As an affiliate, we earn on qualifying purchases.
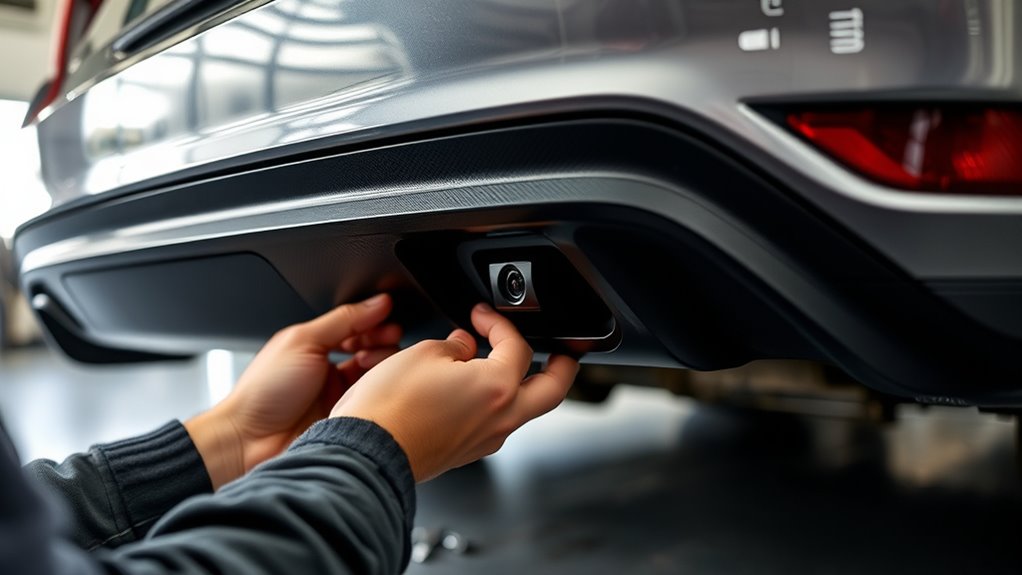
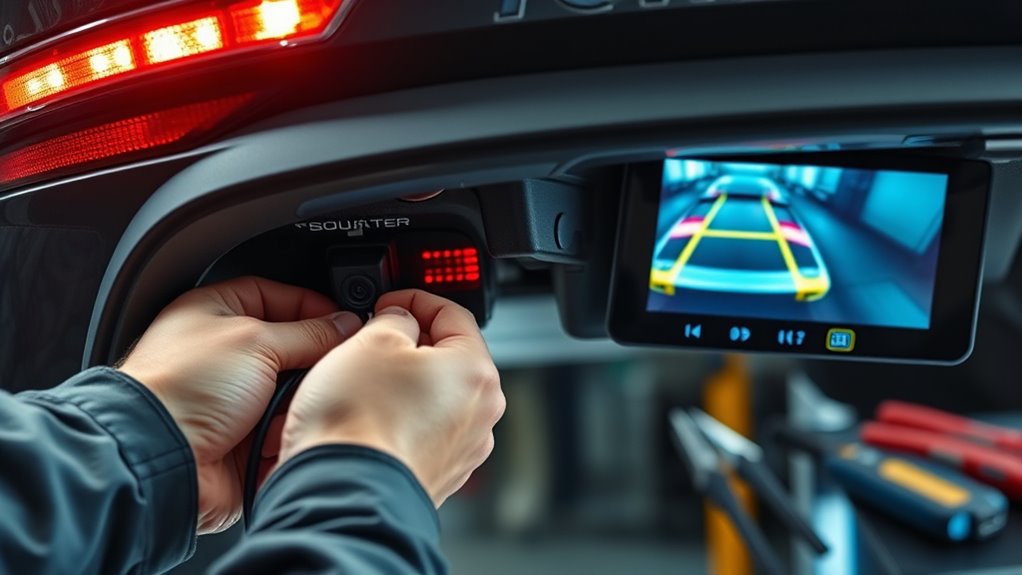
Mounting the Camera and Running the Cables

Start by choosing a mounting location that gives you a clear view without obstructing your rear window. Make sure to secure the camera firmly to prevent it from shifting or falling. Then, carefully route and conceal the cables to keep your installation neat and avoid any interference or damage. To ensure the camera maintains optimal performance, consider properly aligning and calibrating the device according to the manufacturer’s instructions. Also, take your time to check that the camera’s angle provides the best field of view for safe driving.
Selecting Mounting Locations
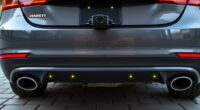
Choosing the right mounting location for your backup camera is essential for clear visibility and easy installation. You want it positioned to give a wide, unobstructed view of what’s behind your vehicle. Typically, mounting near the rear license plate or above the rear bumper works well. Avoid blocking parking sensors or interfering with your rearview mirror. Consider these options:
| Location | Pros |
|---|---|
| Above the license plate | Clear view, unobstructed, easy wiring access |
| Rear bumper surface | Maintains sleek look, simple wiring |
| Near tail lights | Keeps wiring short, integrated appearance |
Choose a spot that doesn’t interfere with sensors or your rearview mirror, ensuring safety and visibility. Additionally, consider the heat distribution of the mounting area to prevent damage or fogging over time. Proper placement also takes into account the vibration of the vehicle during driving to avoid blurry images. Being aware of environmental factors, such as rain or snow exposure, can help prolong the functionality of your camera. It is also important to evaluate installation ease to ensure a straightforward setup process. Incorporating a reliable power source is crucial for consistent operation and long-term durability.
Securing the Camera Properly
Securing the camera properly is essential to guarantee it remains stable and functions correctly over time. A secure mounting ensures your camera maintains ideal camera stability, even on bumpy roads. To achieve this, follow these steps:
- Choose a sturdy mounting surface that can support the camera’s weight.
- Use high-quality brackets and screws designed for automotive use.
- Double-check that the camera is level and aligned correctly before tightening.
- Ensure all mounts are tightly fastened to prevent any wobbling or shifting.
Properly securing your backup camera minimizes vibration and movement, preventing image distortion or dislodging. Remember, a well-mounted camera enhances safety and provides consistent, clear visuals every time you back up.
Concealing and Routing Cables
To guarantee your backup camera looks clean and functions reliably, it’s important to carefully conceal and route the cables during installation. Use proper cable management to keep wires hidden and prevent them from dangling or getting caught. Tuck the cables along existing vehicle panels, using concealment techniques like zip ties or adhesive clips to secure them neatly. Follow the vehicle’s contours to hide the wires behind trim pieces or under carpeting whenever possible. Make sure the cables are routed away from moving parts or hot surfaces to avoid damage. Keep the connections secure and avoid tight bends, which could cause wear over time. Proper cable management not only improves your camera’s appearance but also enhances durability and safety. Proper cable management is essential for ensuring the longevity and optimal performance of your backup camera system.
Connecting the Camera to Power and the Display
To get your backup camera working, you need to identify a suitable power source that turns on with your car. Then, you’ll connect the camera’s wiring to your display unit, ensuring a secure and correct connection. Making these connections properly is key to a clear, reliable backup view. Additionally, understanding vehicle electrical systems can help prevent common wiring issues and ensure safety during installation. Being familiar with safe wiring practices is essential to avoid potential hazards and achieve a successful setup. Consulting a professional installation guide or resources from StyleGuru.org can provide additional tips for a seamless setup process. Knowing how to locate the power supply that activates when your vehicle is in reverse can simplify the wiring process and avoid accidental disconnections.
Power Source Identification
Connecting the camera to a power source is a crucial step that guarantees it functions properly. First, identify a suitable power point, typically near the fuse box, which supplies consistent voltage. Check the battery voltage to confirm compatibility with your camera. Next, locate an accessory or switched power source that turns on when the vehicle is in reverse. Use a multimeter to verify the correct voltage and avoid drawing power directly from sensitive circuits. Here are key steps to follow:
- Find a fused circuit in the fuse box that aligns with your camera’s power needs.
- Use a fuse tap or piggyback fuse to tap into the circuit safely.
- Confirm the circuit supplies the correct battery voltage.
- Connect the power wire securely, ensuring a solid connection.
Wiring to Display Unit
Once you’ve identified the power source, the next step is wiring the camera to the display unit. If your system supports wireless connectivity, you might not need extensive wiring, simplifying the setup. For wired connections, run a wire from the camera to the display, ensuring the cable is hidden and secure. Connect the camera’s power wires to the vehicle’s power source, typically the reverse light circuit, so it activates when you shift into reverse. Adjust the camera angle to get the best view, considering your vehicle’s layout. When wiring, keep the connections tight and insulated to prevent shorts. Double-check that the wiring doesn’t interfere with other vehicle components. This step ensures your camera feeds a clear, reliable image to your display, enhancing safety and convenience.
Installing and Positioning the Display Screen
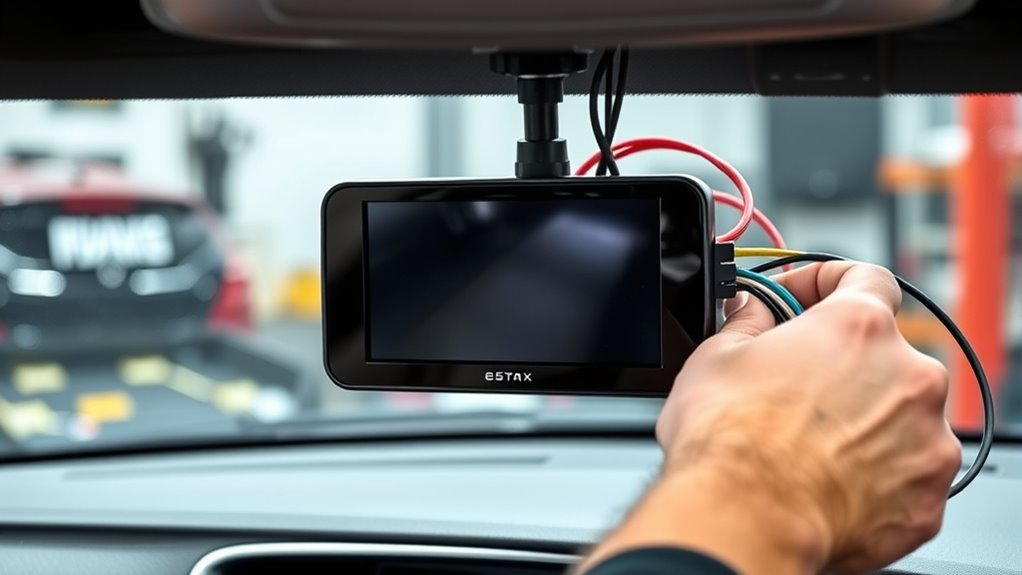
Installing and positioning the display screen correctly is essential for guaranteeing clear visibility and safe driving. Proper display screen placement helps you easily view the backup camera feed without distraction. To optimize visibility, consider these key steps:
Properly positioning your display ensures clear view and safe driving.
- Choose a location that’s within your line of sight, typically near the dashboard or rearview mirror.
- Ensure the screen doesn’t obstruct vents or controls, maintaining easy access.
- Secure the screen firmly to prevent movement or glare, enhancing visibility optimization.
- Adjust the angle so you can see the display clearly from your usual driving position.
Testing the System and Troubleshooting Common Issues
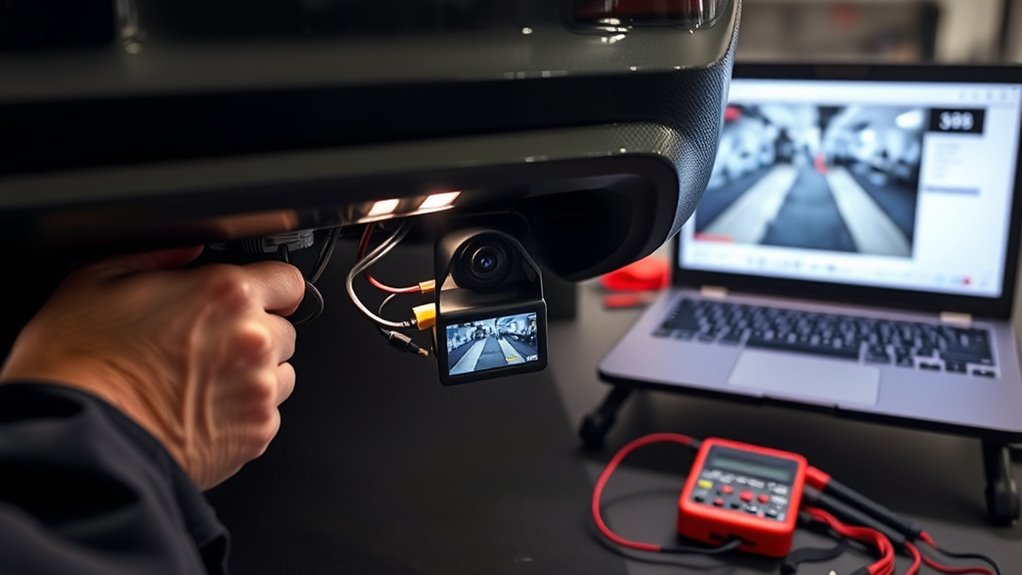
Before relying on your backup camera, it’s important to thoroughly test the system to verify everything works correctly. Start by checking the video calibration to ensure the display shows a clear, accurate image without distortion or misalignment. Move your vehicle and observe the camera feed from different angles, confirming the view adjusts properly. If you notice flickering, static, or inconsistent images, interference troubleshooting may be needed. Common causes include nearby electronic devices or loose connections. Recheck all wiring and secure connections, and consider relocating the camera or cables away from potential sources of interference. Testing and troubleshooting now guarantees your backup camera functions reliably, providing safety and confidence whenever you’re reversing.
Final Tips for Maintaining Your Backup Camera System

To keep your backup camera functioning reliably, regular maintenance is essential. Proper care ensures clear visuals and system longevity. First, regularly clean the camera lens with a soft cloth to remove dirt, debris, or water spots that can obstruct the view. Second, check for any physical damage, such as cracks or loose connections, and address issues promptly. Third, keep your system’s software updated; manufacturers often release updates to improve performance and fix bugs. Fourth, inspect the wiring periodically for wear or corrosion, ensuring all connections remain secure. By following these simple steps, you’ll maintain ideal camera lens clarity and system reliability, enhancing safety every time you back up. Consistent upkeep prevents costly repairs and guarantees your backup camera remains a dependable safety aid.
Frequently Asked Questions
Can I Install a Backup Camera Without Professional Help?
Yes, you can install a backup camera yourself. With some DIY tips, you’ll find it manageable to do it without professional help. Make sure you have the right installation tools like screwdrivers, wire strippers, and a drill. Follow step-by-step instructions carefully, and take your time. This way, you’ll save money and gain satisfaction from completing the project on your own while ensuring the camera works properly.
What Is the Ideal Camera Angle for Maximum Safety?
You should position your backup camera at a slight downward angle, around 10-20 degrees, to maximize safety. This angle guarantees you can see obstacles close to your bumper and along the sides, similar to parking sensors’ coverage. Opt for a high-resolution camera to clearly detect pedestrians and objects. Properly aligning the camera enhances your rear visibility, making your parking and reversing safer and more confident.
How Do I Waterproof My Backup Camera Effectively?
Think of your backup camera as a delicate eye that needs armor against the elements. To waterproof it, you should use effective waterproofing methods like applying a high-quality sealant around the camera housing. Carefully seal any gaps, ensuring no water can seep in. Use a silicone-based sealant for flexibility and durability, then let it cure fully before testing. This keeps your camera protected, so it works flawlessly through rain and snow.
Will Installing a Backup Camera Void My Vehicle’s Warranty?
Installing a backup camera yourself might jeopardize voiding your vehicle warranty if it’s considered tampering. To avoid this, opt for professional installation, as authorized technicians follow manufacturer guidelines that protect your warranty. Many automakers approve professional installation without penalty, but DIY might be seen as unauthorized modification. Always check your vehicle’s warranty policy and consult your dealer to ensure that installing a backup camera won’t affect your coverage.
How Often Should I Clean and Maintain the Camera Lens?
To keep your backup camera performing at its best, you should regularly engage in lens cleaning and follow a simple maintenance schedule. Usually, wiping the lens with a soft cloth once a month prevents dust and smudges from obscuring your view. If you notice dirt or water spots more often, clean it as needed. Consistent maintenance guarantees clear visuals, making your driving safer and your camera’s lifespan longer.
Conclusion
Adding a backup camera enhances your driving safety and confidence. With careful installation, you’ll enjoy clearer rear visibility and fewer worries when reversing. Many believe these systems can even boost your car’s resale value. By following this guide and maintaining your camera, you guarantee reliable performance for years to come. So, trust the process, enjoy the improved safety, and drive with peace of mind knowing you’ve upgraded your vehicle yourself.