To change brake pads, start by gathering the right tools like a jack, lug wrench, and socket set, and verify you have compatible new pads. Safely lift your vehicle, remove the wheel, and access the brake components. Inspect the old pads and system for wear or damage. Remove the old pads carefully, then install the new ones, reassemble everything, and test your brakes. Keep going to learn detailed steps to do it confidently yourself.
Key Takeaways
- Gather the correct tools, new brake pads, and safety gear; ensure vehicle is on a flat surface and securely supported.
- Remove the wheel and caliper to access the brake rotor and old brake pads.
- Inspect brake components for wear, damage, and proper rotor condition before installing new pads.
- Install new brake pads, ensuring proper fit and alignment, then reassemble the caliper and wheel.
- Test drive gently, pump the brake pedal to seat pads, and check for proper brake function and noise.
Gathering the Necessary Tools and Materials

Before you begin changing your brake pads, it’s important to gather all the necessary tools and materials. First, identify the types of brake pads you’ll need, such as ceramic, semi-metallic, or organic, based on your vehicle and driving habits. Each type uses different brake pad materials, affecting performance and longevity. You’ll need a jack, jack stands, a lug wrench, a socket set, and a brake caliper tool to remove and install the pads safely. Also, prepare new brake pads suited to your car’s specifications. Don’t forget safety gear like gloves and eye protection. Having everything ready guarantees a smooth process, prevents interruptions, and helps you work efficiently while understanding the different brake pad materials involved. Be sure to consider piercing care and hygiene if you or your vehicle have any piercings that could be affected during the process. Additionally, understanding the importance of brake system maintenance can help you recognize signs of wear and service needs to keep your vehicle safe. Proper brake pad selection based on your driving style can also enhance safety and performance. Paying attention to auditory feedback cues during installation can help ensure everything is functioning correctly before test driving your vehicle, and staying aware of vehicle manufacturer guidelines can prevent potential damage or safety issues.
Preparing Your Vehicle and Safety Measures

To guarantee safety and proper access to your brake components, you should start by parking your vehicle on a flat, stable surface and engaging the parking brake. This prevents any unintended movement, ensuring vehicle safety during the process. Before working, turn off the engine and disconnect the battery if needed. Check your brake fluid level—low brake fluid can compromise braking performance. Use the following table to understand key safety measures:
| Safety Measure | Why It Matters | Emotional Impact |
|---|---|---|
| Park on a flat surface | Prevents vehicle from rolling | Feel secure and stable |
| Engage parking brake | Keeps vehicle stationary | Confidence in your safety |
| Wear gloves and goggles | Protects against brake dust | Peace of mind while working |
| Check brake fluid level | Ensures brake system integrity | Confidence in brake performance |
| Disconnect the battery | Avoids electrical hazards | Peace of mind, avoiding surprises |
Removing the Wheel and Accessing the Brake Components

Since you’ll need clear access to the brake components, start by loosening the lug nuts on the wheel you’re working on, but don’t remove them completely yet. Use a jack to lift your vehicle off the ground, ensuring it’s secure. Removing the wheel gives you direct access to the brake caliper and rotor, which is essential for changing the brake pads. As you work, keep in mind that removing the wheel can affect your vehicle’s wheel alignment if not handled carefully, so remember proper alignment procedures if you plan to reinstall it later. Also, if you’re rotating your tires, this is a good opportunity to do so. Once the lug nuts are off, carefully pull the wheel away from the hub, exposing the brake assembly for the next steps. Being aware of the impact of wheel removal on vehicle alignment can help maintain optimal handling and safety. Additionally, understanding common repair procedures ensures you can perform the task efficiently and safely. To prevent issues like uneven brake wear, it’s important to follow proper maintenance techniques during the process. Performing these procedures with the right knowledge can help you avoid potential repair complications and ensure your vehicle remains in good condition. Also, taking the time to familiarize yourself with safety precautions can significantly reduce the risk of injury during brake work.
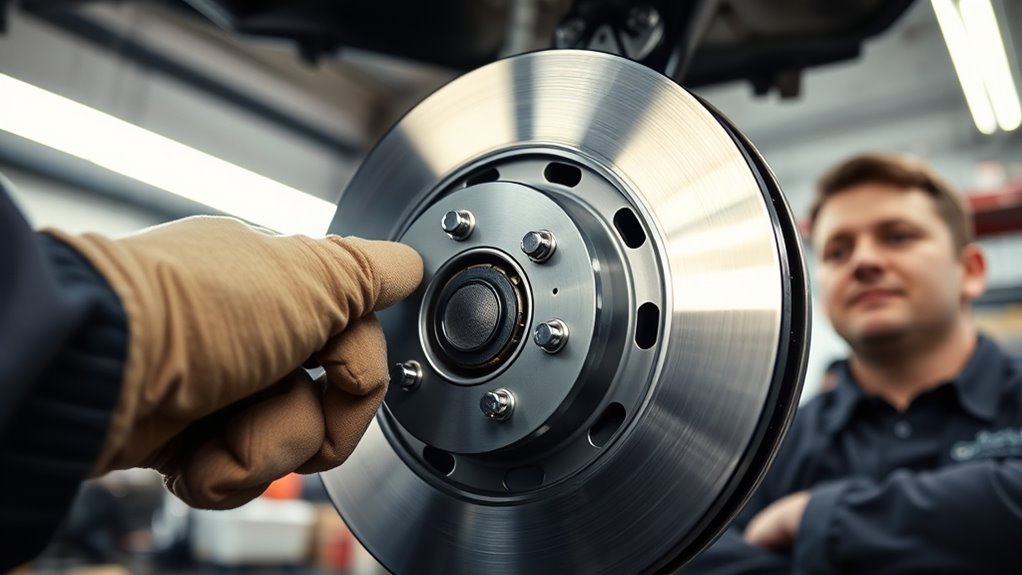
Inspecting the Old Brake Pads and Brake System
Start by visually inspecting the brake pads for uneven wear or thinning material. Check the entire brake system for leaks, rust, or damage that could affect performance. Also, listen for any unusual noises or feel for vibrations when braking, as these can indicate underlying issues. Additionally, inspecting the brake fluid level and quality can help ensure the system functions properly. Proper brake maintenance is essential to prolong the lifespan of your brake system and ensure safe operation. Regularly monitoring brake pad wear can prevent unexpected failures and costly repairs. Incorporating routine checks of environmental conditions can also help maintain optimal brake performance over time. Being aware of corrosion risks in your area can further protect your brake components from deterioration.
Visual Wear Assessment
Inspecting your old brake pads and brake system visually is a crucial step in evaluating their condition before replacement. Look for signs of wear, such as a thin brake pad thickness—less than 1/4 inch indicates it’s time for new pads. Also, check for uneven pad wear, which can hint at alignment issues or sticking components. Uneven wear appears as one side of the pad being noticeably thinner than the other. Use the table below to identify wear patterns:
| Wear Pattern | What It Means |
|---|---|
| Even wear | Pads are generally in good condition |
| Thin, uniform thickness | Pads should be replaced soon |
| Uneven wear | Check for underlying issues like misalignment |
Regular visual assessment helps catch problems early, ensuring safe braking performance. Additionally, understanding the wear patterns can help you determine the urgency of replacing your brake pads. Recognizing signs of wear early can prevent further damage to your braking system and improve overall safety. Incorporating proper inspection techniques can further enhance your ability to detect issues before they become costly repairs. Moreover, familiarizing yourself with common brake system components can aid in more thorough inspections.
Brake System Check
Before replacing your brake pads, it’s essential to thoroughly inspect the entire brake system. Start by examining the brake fluid level; low fluid can indicate leaks or worn components. Next, assess the brake calipers for corrosion, leaks, or sticking. Confirm the calipers move smoothly and aren’t seized, as this can affect braking performance. Check the condition of the brake lines for cracks or damage. Look for signs of leaking brake fluid around the calipers or hoses, which can compromise safety. Also, evaluate the overall condition of the rotors and pads; uneven wear might suggest caliper issues. Performing this extensive check helps you identify potential problems early, ensuring your brake system remains reliable and safe after replacing the brake pads. Additionally, inspecting brake system safety can prevent unexpected failures and enhance overall vehicle reliability. Regular brake maintenance is key to maintaining optimal braking performance and safety. Furthermore, understanding how to properly inspect brake components can save time and money during repairs. Staying informed about brake system conditions can also facilitate timely repairs and improve driver safety. Incorporating routine inspections with preventive maintenance practices can further extend the lifespan of your brake system.
Noise and Vibration Signs
Pay close attention to any noise or vibration coming from your brakes, as these are key indicators of underlying issues with the brake pads or system. Brake noise, such as squealing or grinding, often signals worn brake pads or debris caught in the system. Vibration symptoms, like a shudder or pulsing when you press the brake pedal, can indicate warped rotors or uneven pad wear. These signs shouldn’t be overlooked, as they affect braking performance and safety. If you notice persistent brake noise or vibration symptoms, it’s time to inspect your brake pads and system. Addressing these issues early can prevent further damage and ensure your brakes function smoothly and reliably. Always investigate any unusual sounds or vibrations promptly. Understanding the different styling products can also help you maintain your vehicle’s appearance while ensuring optimal safety.
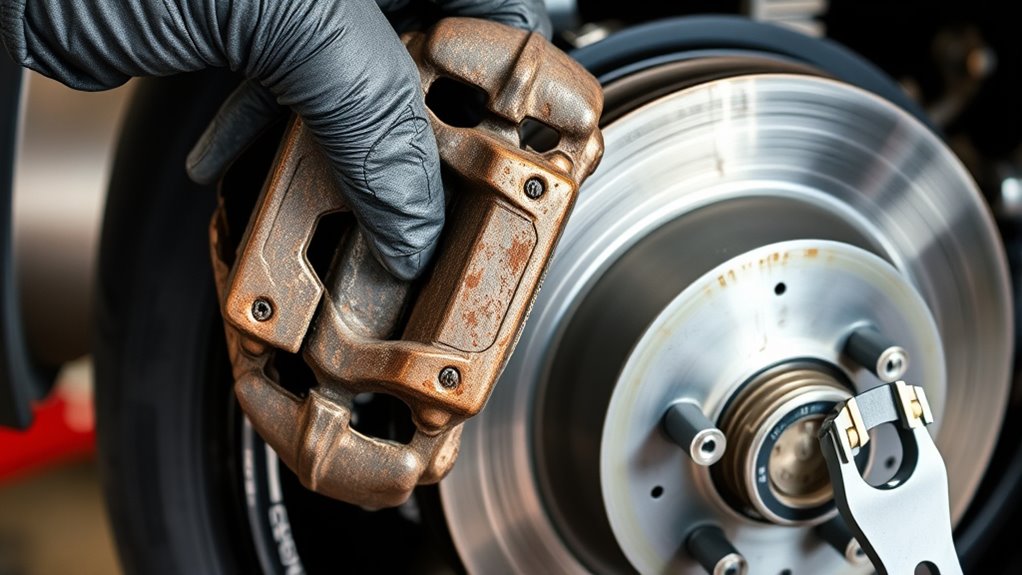
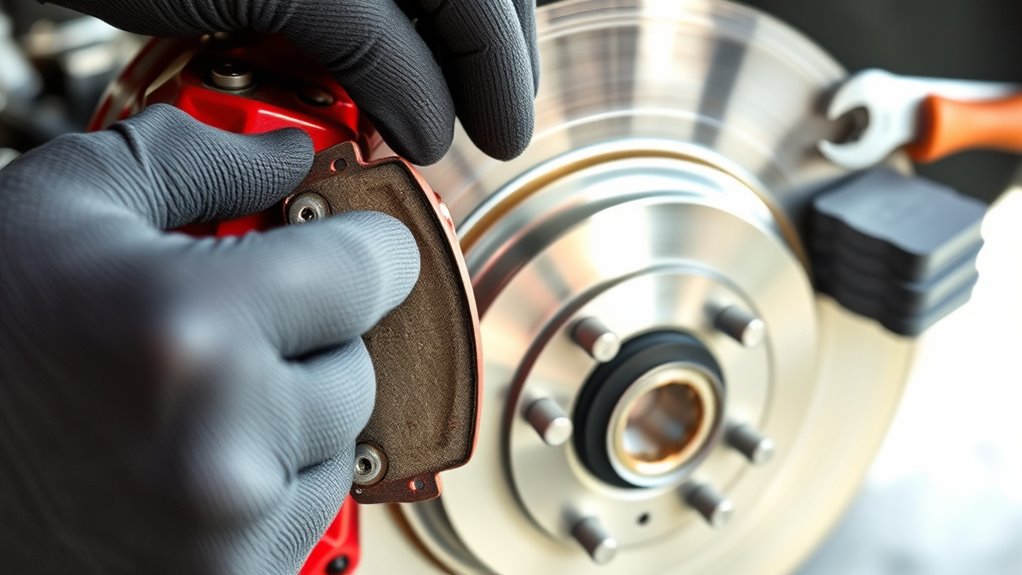
Removing the Old Brake Pads

To remove the old brake pads, start by securely lifting the vehicle and removing the wheel to gain clear access to the brake assembly. Before proceeding, check the brake fluid level; ensure it’s within the recommended range to prevent spillage or air entering the system. Carefully inspect the rotor condition for any warping or deep grooves, as damaged rotors can affect new pad performance. Use a socket wrench to detach the caliper bolts, then gently slide the caliper off the rotor. Support the caliper with a bungee cord or similar device to avoid putting stress on the brake hose. Remove the old brake pads from the caliper bracket, noting how they sit for reference during installation of new pads. Additionally, be aware of the importance of vetted affiliate relationships to ensure transparency and trustworthiness during your repair process.
Installing the New Brake Pads
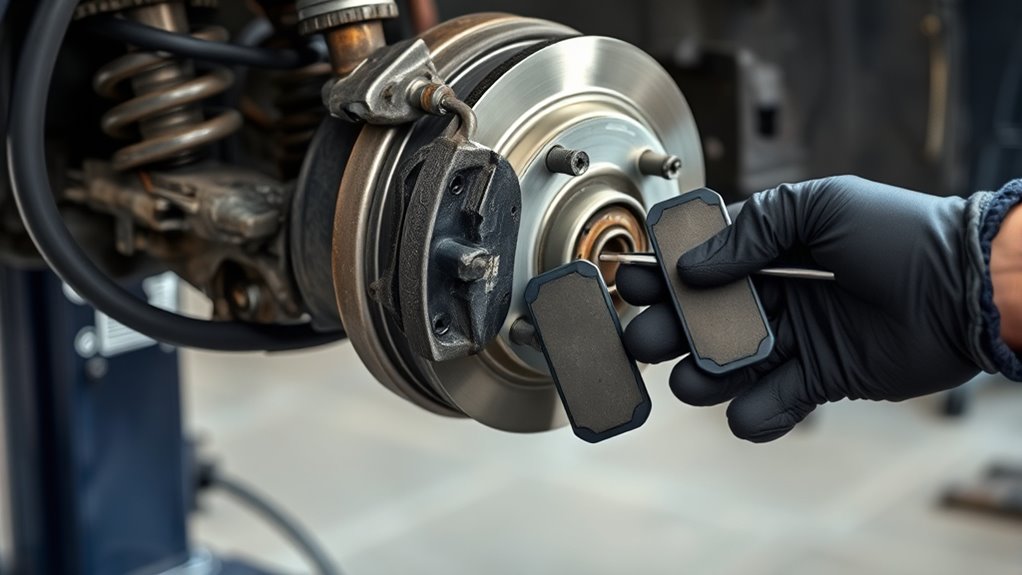
Now that you’ve removed the old brake pads, it’s time to prepare the new ones for installation. Make sure they fit properly and are free of debris before reassembling. Once everything is in place, test your brakes to guarantee they work safely and effectively.
Removing Old Pads Safely
Before installing new brake pads, it’s vital to remove the old ones safely to prevent damage or injury. Handling the old brake pads carefully protects your brake system and ensures smooth operation afterward. When removing the pads, keep in mind that brake pad materials can vary, affecting removal techniques. Also, be aware of different brake pad brands, as some may have specific removal requirements.
- Use the proper tools to avoid damaging calipers or rotors
- Detach clips or pins gently to prevent bending or breaking
- Inspect the caliper and rotor for damage during removal
- Store old brake pads safely to avoid contamination of brake pad materials
Taking these steps ensures a safe removal process, setting the stage for installing your new brake pads effectively.
Preparing New Brake Pads
When preparing to install new brake pads, start by making sure you have the correct replacement parts for your vehicle. Check the brake pad material to match your driving needs—ceramic, semi-metallic, or organic. Verify the brake pad branding to ensure quality and compatibility. Properly selecting pads prevents uneven wear and noise issues.
Here’s a helpful comparison:
| Brake Pad Material | Brake Pad Branding | Recommended Use |
|---|---|---|
| Ceramic | Trusted brands | Quiet, clean braking |
| Semi-metallic | OEM or premium brands | High performance |
| Organic | Budget brands | Light-duty driving |
| Sintered | Well-known brands | Heavy-duty, off-road |
| Resin-based | Lesser-known brands | City driving |
This ensures you choose the right pads for your vehicle’s needs.
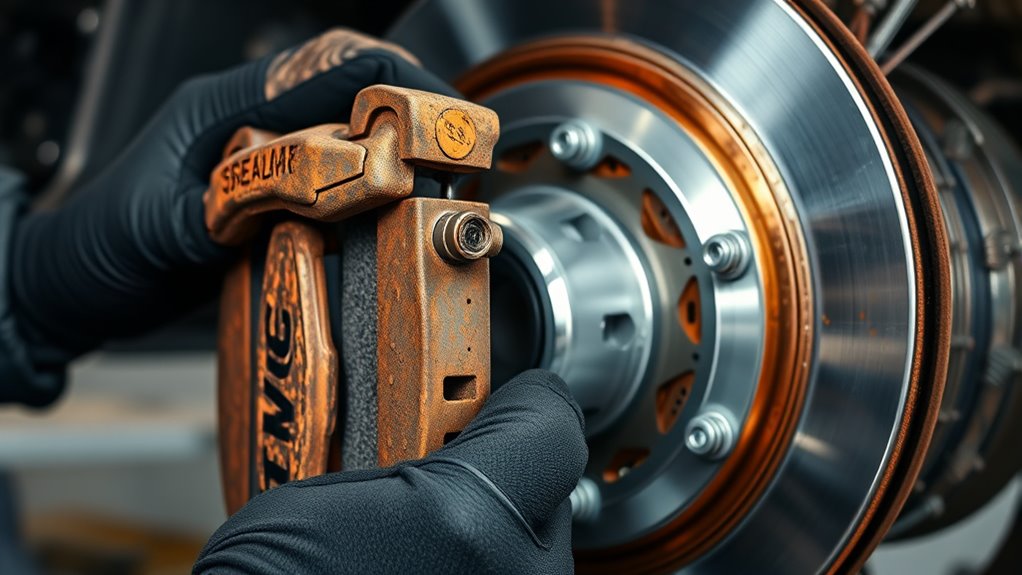
Reassembling and Testing
After installing the new brake pads, carefully position the caliper over the rotor and secure it with the appropriate bolts. Before testing, verify the brake fluid reservoir is topped up, as bleeding may be necessary to remove air bubbles. Engage the parking brake fully to prevent movement during testing. Pump the brake pedal several times to seat the pads properly against the rotor, ensuring firm response. Check for any abnormal noises or vibrations. Finally, test drive at low speeds, applying steady pressure to confirm braking effectiveness. Remember to double-check that all bolts are tight and that the parking brake functions correctly. Proper reassembly and testing help ensure your brake system operates safely and reliably.
Reassembling the Brake Components and Wheel
Once you’ve installed the new brake pads and made sure everything is properly aligned, it’s time to reassemble the brake components and wheel. First, carefully slide the caliper over the brake rotor, ensuring the caliper piston is fully compressed and aligned. Tighten the caliper bolts securely to hold it in place. Check the brake fluid reservoir; if you notice any air or low fluid levels, top it off with fresh brake fluid. Reinstall the wheel and tighten the lug nuts in a star pattern to ensure even pressure. Lower the vehicle carefully, then torque the lug nuts to the manufacturer’s specifications. Double-check all components, guaranteeing everything is secure before moving on to test driving your vehicle.
Testing the New Brake Pads and Ensuring Proper Functionality
With the brake components securely reassembled and the wheel tightened to specification, it’s time to verify that your new brake pads function correctly. Start by pressing the brake pedal a few times to ensure proper brake system calibration and that the brake pad materials engage smoothly. Check for any unusual noises, vibrations, or pull to one side, which could indicate misalignment. Test your brakes at low speed to confirm they respond promptly and effectively. Remember, brake system calibration is key to safe operation, especially after installing new pads.
After reinstalling your brake components, test for proper function, smooth engagement, and absence of noise or vibrations.
- Feel for consistent pedal pressure and stop distance
- Listen for squealing or grinding sounds
- Ensure even wear across brake pads
- Confirm no fluid leaks or abnormal vibrations
Tips for Maintenance and Future Brake Care
Regular maintenance is essential to keep your brake system functioning safely and efficiently over time. Check your brake fluid regularly and top it off if it’s low, as contaminated or old fluid can reduce braking performance. Inspect your brake calipers for signs of corrosion or leaks, which can impair their ability to apply pressure evenly. Keep the brake pads at the proper thickness to prevent damage to the rotors. When replacing brake fluid, use the manufacturer’s recommended type and follow proper bleeding procedures to avoid air in the lines. Regularly test your brakes during routine drives to catch issues early. Proper maintenance guarantees your brakes remain responsive, prolongs their lifespan, and keeps you safe on the road.
Frequently Asked Questions
How Often Should Brake Pads Be Replaced?
You should replace your brake pads roughly every 25,000 to 70,000 miles, but it depends on brake pad materials and driving habits. Organic pads may wear faster, while ceramic ones last longer. Regular inspections help determine brake pad lifespan—look for squealing, reduced braking performance, or a thinner pad surface. Replacing them promptly guarantees safe stopping and prevents damage to rotors, maintaining your vehicle’s braking efficiency.
Can I Change Brake Pads Without Professional Help?
Changing brake pads yourself is doable, but don’t underestimate the challenge—it’s like defusing a bomb! You can do it without professional help if you prioritize DIY safety and have the right tool requirements, including a jack, wrench, and brake caliper tool. Make sure to guarantee safety precautions, such as wearing gloves and eye protection, and carefully follow instructions. If you’re unsure, consulting a professional ensures your safety and your vehicle’s performance.
What Are Signs of Worn Brake Pads?
You’ll notice worn brake pads if you hear brake noise, like squealing or grinding, when you brake. You might also feel pedal softness or a spongy brake pedal, which indicates the pads are thinning. Additionally, increased stopping distance and vibration when braking are signs of worn pads. Keep an eye on these symptoms, and don’t ignore them, as they can affect your safety and braking performance.
Are Ceramic Brake Pads Better Than Organic Ones?
Ceramic brake pads are generally better than organic ones because they offer superior ceramic durability, lasting longer and performing well under various conditions. While organic pads tend to be cheaper, they wear out faster and generate more dust. If you want longevity and less maintenance, ceramic pads are the smarter choice, even if they come with a higher initial organic cost. You’ll enjoy quieter, cleaner braking with ceramic pads overall.
How Long Does It Take to Change Brake Pads?
Changing brake pads typically takes about 1 to 2 hours, depending on your experience and the vehicle. You’ll need to take into account brake pad materials, like ceramic or organic, as they influence installation time. Proper brake pad maintenance ensures safety and longevity, so take your time to do it right. If you’re new, expect it to take a bit longer, but with patience, you’ll get it done efficiently.
Conclusion
Changing your brake pads is a manageable task that can save you money and boost safety. Did you know that regular brake maintenance can extend pad life by up to 50%? By following these simple steps, you guarantee your vehicle stays in top shape and your stops are smooth. Remember to stay cautious and perform routine checks. With a little effort, you’ll keep your brakes working flawlessly and enjoy safer drives every time.