
To change a tire safely, first prepare your vehicle on a flat surface, engage the parking brake, and verify safety gear is ready. Loosen the lug nuts slightly, then lift the car with a jack at the proper point. Remove the flat tire, place the spare on the hub, and hand-tighten the lug nuts. Use a torque wrench to tighten them in a star pattern, then check everything before hitting the road. Keep going to learn more essential tips for a safe tire change.
Key Takeaways
- Align the spare tire with the wheel studs and slide it onto the hub securely.
- Hand-tighten the lug nuts in a star pattern to ensure even seating.
- Use a torque wrench to tighten lug nuts to the manufacturer’s specified torque.
- Double-check that all lug nuts are properly tightened before driving.
- Verify tire pressure and perform final safety checks before resuming your journey.

Beaiguna Portable Car Jack Kit, 2 Ton (4409 lbs) Scissor Jack for Car, Upgrade Emergency Spare Tire Changing Repair Kit, Scissor Jack Kit with Lug Wrench, Universal Vehicle Scissor Lift Jacks for SUV
CAR JACK SPECIFICATION: This small car jack has a maximum weight capacity of 2 tons. The adjustable height…
As an affiliate, we earn on qualifying purchases.
As an affiliate, we earn on qualifying purchases.
Preparing Your Vehicle and Safety Measures

Before you begin changing a tire, it’s essential to prepare your vehicle and make certain safety measures are in place. First, confirm your car is on a flat, stable surface to prevent it from rolling. Engage the parking brake and turn on your hazard lights to alert others. Check the tire pressure of the spare to verify it’s adequately inflated. Proper jack placement is critical; locate the designated jacking point—usually marked on the vehicle—and position the jack securely underneath. Avoid placing the jack on uneven or soft ground, as this can cause instability. Taking these steps helps protect you from accidents and makes the process smoother. Additionally, familiarizing yourself with free floating concepts can help ensure your safety and efficiency during the process. Being aware of lifevest advisors strategies for risk management can also be beneficial in case of unexpected issues. Utilizing a field‑of‑view approach to assess your surroundings can further enhance your safety. Incorporating knowledge of Gold IRA markets can also inform your overall approach to preparedness and risk mitigation when handling vehicle emergencies. Recognizing the importance of essential safety gear such as gloves and reflective vests can also contribute to a safer working environment. Once everything is set, you’re ready to move on to removing the flat tire and accessing your spare.
Beaiguna Portable Car Jack Kit, 2 Ton (4409 lbs) Scissor Jack for Car, Upgrade Emergency Spare Tire Changing Repair Kit, Scissor Jack Kit with Lug Wrench, Universal Vehicle Scissor Lift Jacks for SUV
CAR JACK SPECIFICATION: This small car jack has a maximum weight capacity of 2 tons. The adjustable height…
As an affiliate, we earn on qualifying purchases.
As an affiliate, we earn on qualifying purchases.
Removing the Flat Tire and Accessing the Spare

Once you have your vehicle properly prepared and secured, you can begin removing the flat tire. First, locate the spare tire, which may vary in type—full-size or compact. Before removing it, check the tire pressure of the spare to verify it’s adequately inflated; a properly inflated spare is vital for safe driving. If the spare is underinflated, inflate it to the recommended pressure listed in your vehicle’s manual. Then, loosen the lug nuts slightly without removing them completely, using the lug wrench. Carefully lift the flat tire off the hub, keeping the lug nuts in a safe spot. Accessing the spare tire becomes easier once the flat tire is removed, allowing you to prepare for installation. Additionally, understanding the importance of contrast ratio can help ensure you’re aware of the quality of your vehicle’s lighting and visibility during the process. Knowing how to properly secure the vehicle is also crucial to prevent accidents while changing the tire. Being aware of vehicle stability can also help you maintain safety throughout the tire-changing procedure. Remember that correct wheel placement is essential for safe and effective tire replacement. For added safety, consider the availability of roadside assistance in case of emergencies during the process.

ETENWOLF Pencil Tire Pressure Gauge 2 Pack (10-50PSI, 20-120PSI) with 16 Tire Caps Calibrated to ANSI B40.1 Grade B(2%), Stainless Steel Body, Car Accessories for Cars, Pickups, RVs, Bicycles
HIGH ACCURACY: Every ETENWOLF's pencil tire gauge is calibrated to ANSI B40.1 Grade B, it is accurate to…
As an affiliate, we earn on qualifying purchases.
As an affiliate, we earn on qualifying purchases.
Positioning and Securing the Spare Tire
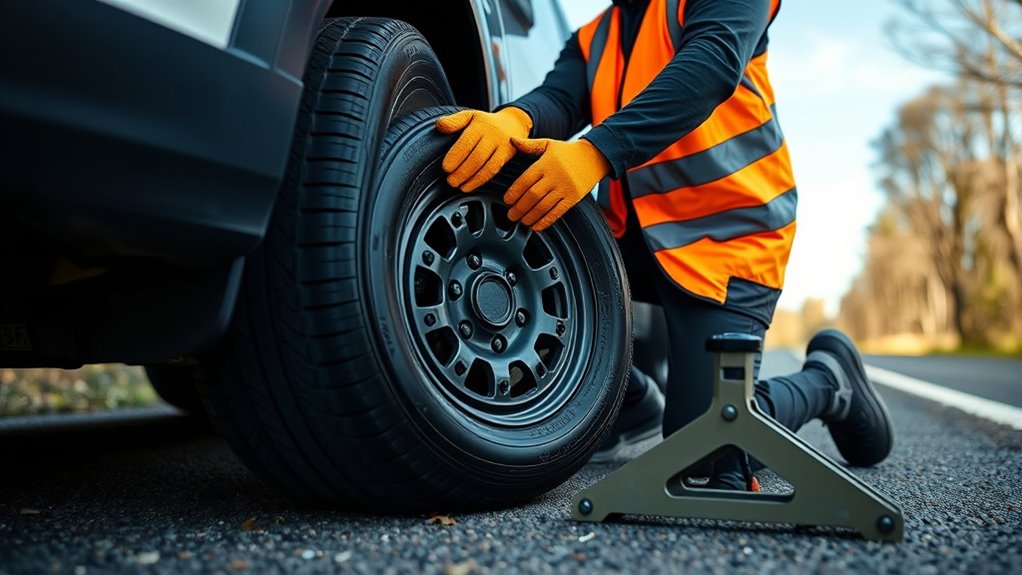
To properly position and secure the spare tire, align it with the hub and slide it onto the wheel studs. Make sure the tire is centered and sits flush against the hub. Check the tire’s pressure before installation; a properly inflated spare guarantees safety and ease of securing it. Once in place, tighten the lug nuts by hand to hold the tire steady. If you’re using a full-size spare, ensure it’s stored correctly in your spare storage area, avoiding any loose items that could cause damage or noise. Confirm the tire is securely mounted and the lug nuts are snug but not fully tightened yet. Proper positioning prevents wobbling and ensures the spare is ready for safe driving.

XOOL Emergency Warning Triangle Kit – Roadside Safety Kit with Reflective Warning Triangles, High-Visibility Safety Vests, Storage Bag & Gloves for Car Breakdowns & Emergencies
Essential Roadside Safety Kit: Be prepared for unexpected roadside emergencies with the XOOL Emergency Safety Kit. Whether it’s…
As an affiliate, we earn on qualifying purchases.
As an affiliate, we earn on qualifying purchases.
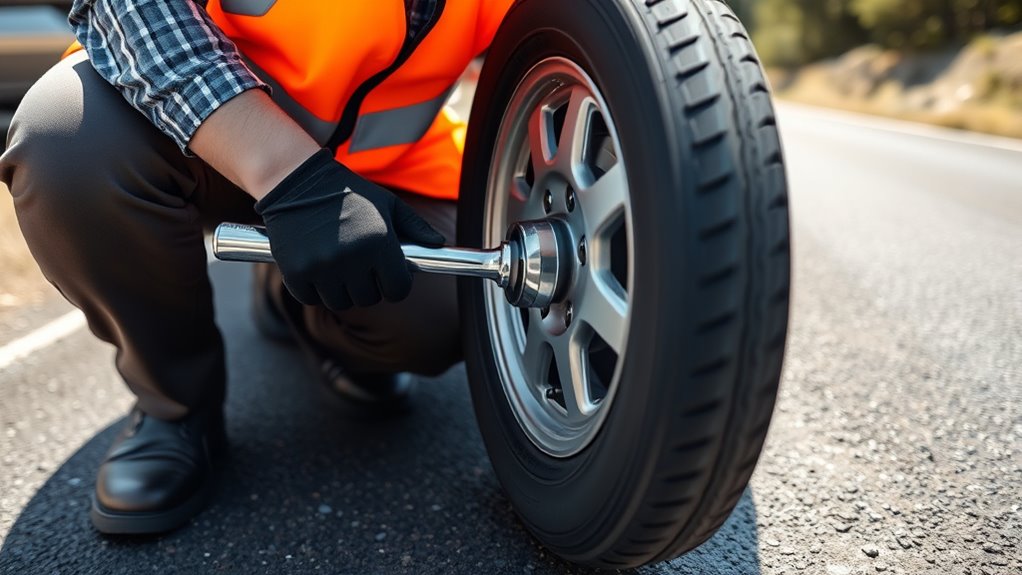
Tightening Lug Nuts Correctly

After securing the spare tire in place, it’s time to tighten the lug nuts properly. Use a torque wrench to tighten each nut in a star pattern, guaranteeing even pressure. This helps prevent damage and maintains proper wheel alignment. Over-tightening can strip threads, while under-tightening risks the wheel coming loose. Refer to your vehicle’s manual for the recommended lug nut torque specification. To keep things organized, note the following:
| Step | Action | Tips |
|---|---|---|
| Tighten in a pattern | Star pattern, moving across nuts | Ensures even tightening |
| Check torque | Use torque wrench at specified torque | Prevents wheel issues |
| Confirm tightness | Recheck after initial tightening | Avoid loose lug nuts |
| Final inspection | Ensure nuts are secure and even | Maintains wheel alignment |
Additionally, understanding proper torque specifications is essential for safe and reliable wheel mounting. Proper torque application ensures the lug nuts are neither too loose nor too tight, which is crucial for preventing damage and maintaining the integrity of the wheel assembly. Recognizing correct tightening techniques can help avoid common mistakes during this process. Performing a final check after driving a short distance can help ensure everything remains secure and safe. Being aware of wheel lug nut patterns can assist in achieving even tightening and optimal safety.
Final Checks and Road Readiness

Before hitting the road, it’s vital to perform a final inspection to make sure everything is secure and ready for safe driving. First, check the tire pressure of your spare to verify it matches the recommended levels. Proper tire pressure helps maintain control and prevents blowouts, especially if road conditions are rough or unpredictable. Examine your lug nuts to confirm they’re tightened correctly. Also, verify that the tire is seated properly on the wheel hub. Look over the route for any potential hazards or adverse road conditions that could affect your drive. Make sure your vehicle’s lights, signals, and brakes are functioning properly. Conducting a final safety check before departure is essential to ensure all aspects of your vehicle are in optimal condition, reducing the risk of issues once you’re back on the road. Additionally, reviewing your vehicle maintenance schedule can help identify any upcoming service needs that might impact safety and ensure your vehicle remains in road-ready condition. Being aware of your security zone features, such as alarms or cameras, can also help you feel more confident during stops or breaks on your journey. Regularly consulting your vehicle’s owner’s manual can provide valuable insights into safety features and maintenance tips specific to your model.
Frequently Asked Questions
How Often Should I Check My Spare Tire’s Pressure?
You should check your spare tire’s pressure at least once a month to make sure it’s ready when needed. Regularly inspecting helps prevent issues caused by tire aging and keeps it properly inflated, which is essential if you need to use it suddenly. Also, during tire rotation, verify the spare’s pressure. Maintaining correct pressure extends the spare’s lifespan and guarantees safe, reliable use in emergencies.
Can I Drive Long Distances on a Spare Tire?
Yes, you can drive long distances on a spare tire, but it’s not recommended for tire safety or driving restrictions. Spare tires, especially compact ones, are designed for temporary use and limited speeds. To avoid accidents or damage, drive cautiously, stick to moderate speeds, and plan to replace it with a regular tire as soon as possible. Always check your spare’s pressure before hitting the road.
What Tools Do I Need Besides the Jack and Lug Wrench?
Besides the jack and lug wrench, you’ll want a tire repair kit and a tire pressure gauge. The repair kit helps if you need to patch minor punctures before installing the spare, while the pressure gauge guarantees your spare is properly inflated for safe driving. Keep these tools in your vehicle so you’re prepared for unexpected flats, making your tire change safer and more efficient.
How Do I Know if My Spare Is Compatible With My Vehicle?
You can determine if your spare is compatible with your vehicle by checking the vehicle tire specifications in your owner’s manual or on the tire placard inside the driver’s door. Verify the spare matches the size and type recommended for your car. Look for labels or markings on the spare tire itself that indicate compatibility. If unsure, consult your manufacturer or a professional to confirm your spare tire’s compatibility before driving.
What Should I Do if the Lug Nuts Won’T Tighten Properly?
If your lug nuts won’t tighten properly, don’t force them, as this can damage threads. Instead, check for cross-threading or debris and clean the lug holes. Use a torque wrench to guarantee proper tire tightening, and tighten the lug nuts in a star pattern gradually. If they still won’t tighten, replace the damaged lug nuts or seek professional help. Properly securing your tire is essential for safe driving.
Conclusion
Remember, safety comes first. By following these steps carefully, you’ll have your spare on in no time and be back on the road. Keep in mind, a stitch in time saves nine—addressing tire issues promptly can prevent bigger problems later. Stay calm, stay prepared, and don’t rush. With patience and attention, you’ll handle this situation confidently. Before you know it, you’ll be back to enjoying your drive, safe and sound.