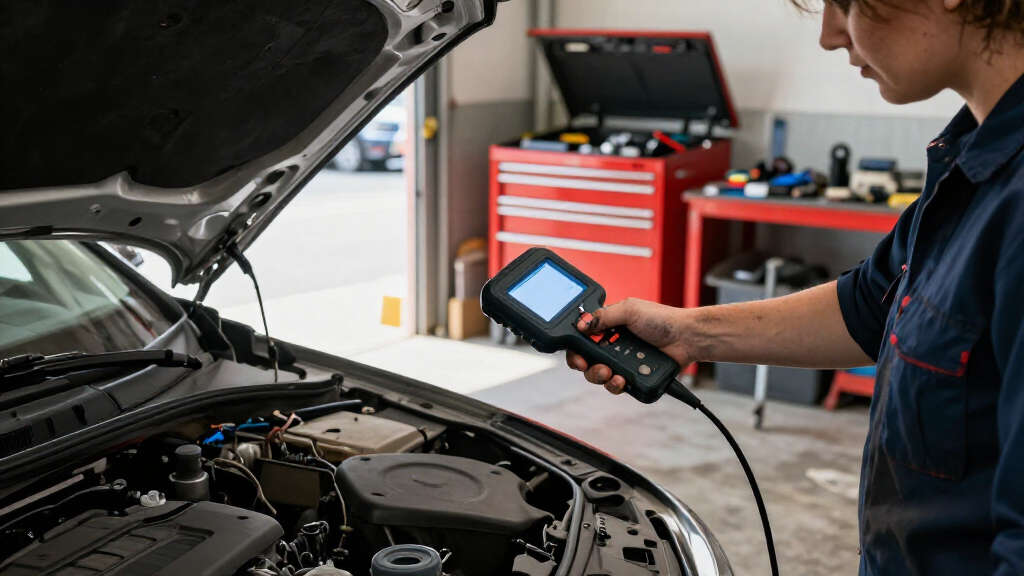
Use this guide to connect an OBD-II scanner, retrieve diagnostic trouble codes, and review basic vehicle data. It is for drivers with little or no diagnostic experience who want to understand what a warning light may indicate before deciding what to do next. Allow 15–30 minutes, depending on the scanner and whether the vehicle is ready to communicate.

Get business pricing on garage and car supplies
- Business-only prices and quantity discounts
- Tax-exempt purchasing
- Multiple users, one account, clear invoices

EDIAG H361 Bidirectional OBD2 Scanner with Lifetime Free Updates
- ✔ Diagnostic systems: Engine, transmission, ABS, and SRS
- ✔ Maintenance functions: 16
- ✔ Display: 6-inch touchscreen

ANCEL AD410 Enhanced OBD2 Scanner and Vehicle Code Reader
- ✔ Display: 2.4-inch color display
- ✔ Diagnostics: Engine and emissions codes, live data, freeze-frame, O2 sensor and EVAP tests
- ✔ Vehicle compatibility: Most U.S. OBD2 vehicles from 1996 onward; many EU and Asian vehicles from 2000 onward

ANCEL AD310 OBD II Scanner and Engine Fault Code Reader
- ✔ Model: AD310
- ✔ Connector: OBD II
- ✔ Cable length: 2.5 ft
Difficulty: Beginner | Time: 15–30 minutes
What You’ll Need
Tools & Materials:
- OBD-II or EOBD-compatible scanner
- Vehicle owner’s manual
- Phone or paper for recording codes, if needed
Knowledge:
- Ability to locate the vehicle’s diagnostic connector using the owner’s manual
- Ability to follow the scanner’s on-screen prompts
Most cars and light trucks sold in the United States from model year 1996 onward support OBD-II. Many vehicles in other regions use EOBD or a related system, but coverage and features vary. Check the scanner’s compatibility list before connecting it. Park on level ground, apply the parking brake, and keep the vehicle away from moving traffic. Do not use a scanner while driving.
EDIAG H361 Bidirectional OBD2 Scanner with Lifetime Free Updates
The EDIAG H361 earns the top position because it reaches beyond the engine and emissions focus of both ANCEL scanners. It covers engine, transmission, ABS, and SRS, and its bidirectional controls can activate supported components during troubleshooting. That makes it better suited to narrowing down problems than a reader that only returns an engine code. Its 16 maintenance functions, AutoVIN, and live-data graphs further support more involved diagnosis.Those capabilities are useful when a warning light points to a system the AD310 and AD410 cannot access. The six-inch touchscreen also gives us more room to view reports and data than either compact ANCEL display. But the H361 asks more of its buyer: functions vary by vehicle, it uses a wired connection, and FCA AutoAuth requires a separate account and paid subscription. Compared with the simpler ANCEL tools, this is the clear choice for system breadth, but it is excessive if we only need to check an emissions code or readiness status.
Pros:
- Diagnoses engine, transmission, ABS, and SRS systems
- Bidirectional controls support component activation where the vehicle allows it
- Includes 16 maintenance functions, AutoVIN, and live data graphs
- Large touchscreen, physical buttons, and lifetime free updates
Cons:
- Functions vary by vehicle, so coverage needs checking before purchase
- FCA AutoAuth requires a separate account and paid subscription
- Wired connection limits convenience compared with wireless tools
Best for: Owners and repair-focused users who need multi-system diagnostics, supported component activation, and maintenance functions.
Not ideal for: Drivers who only need basic engine code checks, or buyers who expect every function to work on every vehicle without checking compatibility.
Bottom line: We rank the H361 first for buyers who need deeper, multi-system troubleshooting and can verify vehicle-specific support.
“We rank the H361 first for buyers who need deeper, multi-system troubleshooting and can verify vehicle-specific support.”
ANCEL AD410 Enhanced OBD2 Scanner and Vehicle Code Reader
The ANCEL AD410 is our middle pick for drivers who want more diagnostic context than a basic reader without stepping up to the H361’s multi-system scope. It reads and clears engine and emissions codes, shows live and freeze-frame data, and adds O2 sensor and EVAP tests. Built-in code definitions and DTC lookups can help us make sense of a fault before deciding whether it needs a closer look.Compared with the AD310, the AD410 offers a color display, multilingual menus, and more emissions-focused checks. That makes it the stronger of the two ANCEL choices when we want guidance at the scanner itself. Its boundary remains important: it does not diagnose ABS, SRS, or transmission systems, and it cannot perform bidirectional control or service resets. So while it gives a more complete engine-focused view than the AD310, it cannot substitute for the broader H361 when a fault lies outside emissions and engine diagnostics. Compatibility also varies, so verify support for the specific vehicle.
Pros:
- Built-in code definitions and DTC lookups provide context for fault codes
- Includes live data, freeze-frame, I/M readiness, O2 sensor, and EVAP checks
- Color display and multilingual menus make navigation clearer
- Powered directly by the vehicle’s OBD2 port, without a phone app
Cons:
- Limited to engine and emissions diagnostics
- No bidirectional control or service resets
- Vehicle compatibility and functions can vary
Best for: DIY drivers who want engine and emissions code explanations, live data, and O2 sensor or EVAP checks through a standalone scanner.
Not ideal for: Owners who need ABS, SRS, transmission, bidirectional, or service-reset functions.
Bottom line: We recommend the AD410 over the AD310 when code explanations and added emissions tests matter more than multi-system coverage.
“We recommend the AD410 over the AD310 when code explanations and added emissions tests matter more than multi-system coverage.”
ANCEL AD310 OBD II Scanner and Engine Fault Code Reader
The ANCEL AD310 is the most straightforward option in this group. It reads and clears emission-related engine trouble codes, then adds live data, freeze-frame information, and I/M readiness for a practical picture of engine faults and emissions status. Labeled buttons and a clear screen keep the basic workflow direct, and the scanner draws power through the OBD II connector, so there is no battery to manage.Next to the AD410, the AD310 gives up the color display, built-in code definitions, and O2 sensor and EVAP checks. That makes it less helpful when we need more explanation or a targeted emissions test. It is also far less capable than the H361, which can reach transmission, ABS, and SRS systems. The AD310 makes sense when the job is limited to common engine-code checks and readiness monitoring; anyone looking for broader diagnostics should move up to one of the other picks. It requires an OBD II interface and does not cover OBD I vehicles.
Pros:
- Reads and clears emission-related engine trouble codes
- Shows live data, freeze-frame information, and I/M readiness
- Clear screen and labeled buttons support simple operation
- Compact, lightweight unit powered by the vehicle connector
Cons:
- Limited to emission-related diagnostics
- Does not support ABS, SRS, or transmission systems
- Requires an OBD II interface and does not work with OBD I
Best for: Drivers who want a simple wired tool for reading and clearing engine emissions codes and checking readiness.
Not ideal for: Buyers who want built-in code explanations, O2 or EVAP tests, or access to ABS, SRS, and transmission systems.
Bottom line: We choose the AD310 for basic engine and emissions checks when the AD410’s added explanations and tests are unnecessary.
“We choose the AD310 for basic engine and emissions checks when the AD410’s added explanations and tests are unnecessary.”
As an Amazon Associate we earn from qualifying purchases.
Before You Start
Read the scanner instructions first. Some scanners connect by cable; others pair with a phone over Bluetooth or Wi-Fi. Keep the ignition off while plugging in a wired scanner unless its instructions say otherwise. Do not clear codes or disconnect the battery before recording the results: doing so can erase useful diagnostic information and reset emissions readiness monitors. A trouble code points to a system or condition the vehicle detected; it does not, by itself, identify a failed part.
Step-by-Step Instructions
Step 1: Park and prepare the vehicle
Park on a level surface, shift an automatic transmission into Park or a manual transmission into neutral, and apply the parking brake. Turn off accessories such as the headlights, climate control, and audio system. Keep the engine off for the initial connection. If the vehicle is in an enclosed garage, do not start the engine there; exhaust can build up quickly.
Tip:If a warning light is flashing, the engine is running roughly, or the vehicle has lost power, avoid driving it to perform checks. Arrange professional help or roadside assistance.
Check: The vehicle is stationary, secured, and switched off, with the scanner and owner’s manual within reach.
Step 2: Find the diagnostic connector
Look for the 16-pin OBD-II connector beneath the dashboard, usually on the driver’s side near the steering column. Check the owner’s manual if you cannot see it; the connector may sit behind a small cover or low trim panel. Do not force the scanner into a connector that does not match its plug.
Tip:The connector is generally within reach of the driver’s seat, but its exact location varies. Avoid mistaking an unrelated port or accessory socket for the diagnostic connector.
Check: You have found a connector with the same shape and pin arrangement as the scanner plug.
Step 3: Connect the scanner
With the ignition off, insert the scanner plug straight into the diagnostic connector. For a wireless adapter, plug it in securely and follow its instructions to pair with the intended phone or app. Keep the adapter and cable clear of pedals, the steering column, and other moving parts.
Tip:Do not pull on the cable to remove a scanner. Grip the plug and release it gently when the scan is complete.
Check: The scanner powers on or its app detects the adapter. If it does not, check that the plug is seated and the vehicle battery is not discharged.
Step 4: Switch on the ignition
Turn the ignition to the On position without starting the engine, if your vehicle has a separate ignition setting. For a push-button start, follow the vehicle manual’s instructions for turning on the electronics without starting the engine; this often involves pressing the button without pressing the brake or clutch. Then choose the scanner’s option to connect to the vehicle or read diagnostic information.
Tip:Scanner and vehicle prompts differ. Follow the scanner’s instructions if they specify a different ignition sequence. Avoid repeatedly pressing the start button without checking the manual.
Check: The scanner identifies the vehicle or begins communicating with its control module.
Step 5: Read and record diagnostic codes
Select the option labeled Read Codes, Trouble Codes, or a similar phrase. Wait for the scan to finish, then record each code exactly as shown, including its letter and digits. Note whether the scanner labels it stored, pending, or permanent, and copy any accompanying description. Save or photograph the results if the scanner offers that option.
Tip:A code such as P0301 indicates a detected condition associated with cylinder 1 misfire, but the cause could involve several systems. Treat the code as a starting point for diagnosis, not an instruction to replace a named part.
Check: You have a complete record of every displayed code and its status, or the scanner reports that no codes were found.
Step 6: Check warning-light and live-data information
If available, review the scanner’s status for the check-engine light and emissions readiness monitors. To view live data, select a small group of relevant readings, such as engine speed, coolant temperature, or oxygen-sensor information. Follow the scanner’s prompts about whether the engine should be running. Start it only in a well-ventilated outdoor location, with the vehicle secured, and keep clear of hot or moving parts.
Tip:Readings vary with engine temperature, load, and vehicle design. Compare them with the vehicle service information or ask a qualified technician to interpret values that seem unusual.
Check: The scanner displays available status or live readings, and you have noted anything relevant alongside the codes.
Step 7: Choose what to do with the results
Use the codes, their status, the warning-light behavior, and the vehicle’s symptoms to decide on a safe next step. Consult reliable service information for the exact vehicle and code, or share your recorded results with a repair professional. If the engine light is flashing, the engine overheats, oil-pressure warning appears, brakes feel unsafe, or the vehicle runs severely rough, stop driving when safe and arrange assistance.
Tip:Do not clear the codes simply to turn off a warning. Clearing can remove diagnostic context and reset readiness monitors, while leaving the underlying fault unresolved.
Check: You have a recorded scan and a clear plan to investigate further, monitor the vehicle, or seek repair help based on its condition.
Step 8: Disconnect and store the scanner
Turn the ignition off and wait for the scanner to finish any save or disconnect process. Remove the plug by holding its body, then store the scanner and your code notes together. If the scanner is a wireless adapter, disconnect it after use unless its maker and vehicle instructions support leaving it installed.
Tip:Some adapters can draw power while connected. Removing one after scanning avoids a possible battery drain.
Check: The ignition is off, the scanner is disconnected, and the diagnostic results are saved for reference.
Common Mistakes to Avoid
- Assuming a scanner can access every vehicle system. — Check compatibility and feature coverage; basic OBD-II tools may not read airbag, ABS, or manufacturer-specific modules.
Troubleshooting
Problem: The scanner does not power on.
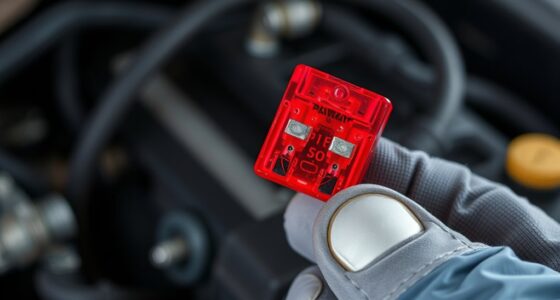
Solution: Check that the ignition setting and connector are correct, reseat the plug, and consult the owner’s manual for diagnostic-port fuse information. If the vehicle battery is weak or the port has no power, get the electrical fault checked.
Problem: The scanner powers on but cannot connect to the vehicle.
Solution: Confirm the scanner supports the vehicle’s model year and protocol. Follow the required ignition sequence, retry once, and check the manual for connection steps. A damaged connector, wiring fault, or control-module issue may need professional diagnosis.
Problem: The scanner reports no codes, but a warning light remains on.
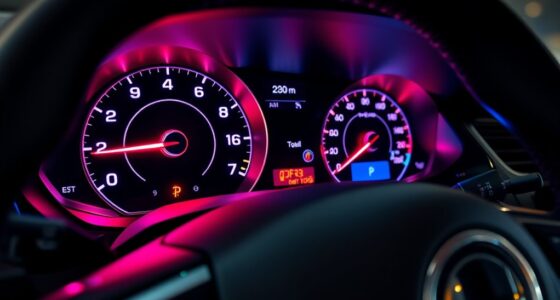
Solution: Check whether the scanner can read the system that triggered the light; basic OBD-II scanners mainly cover emissions-related engine and transmission data. Use a tool with the needed system coverage or ask a repair professional to scan it.
Problem: A code returns after it was cleared or the vehicle was driven.
Solution: Record the returning code and note when it reappears. The underlying condition may still be present; use vehicle-specific diagnostic steps or arrange a repair rather than clearing it repeatedly.
What Success Looks Like
The scan is complete when you have recorded all displayed diagnostic codes and statuses, noted available warning-light or live-data information, and disconnected the scanner safely. You know whether the scanner found codes or none, and you have a sensible next action. A successful scan does not prove the vehicle is repaired or safe to drive if symptoms or warning lights remain.
Next Steps
Keep the scan record with the vehicle’s service history and share it with a technician if diagnosis or repair is needed. After a repair, rescan to check whether the code returns; readiness monitors may need normal driving before they report complete. Follow the vehicle manual and local inspection requirements before relying on emissions readiness results.
Frequently Asked Questions
Can I use a car diagnostic scanner while the engine is running?
Many scanners can show live data with the engine running, but follow the tool’s prompts. Run the engine only outdoors in a ventilated area, secure the vehicle, and keep hands, cables, and clothing away from moving or hot parts.
Will a basic OBD-II scanner read ABS or airbag codes?
Often it will not. Many basic scanners focus on emissions-related engine and transmission codes. Check the scanner’s listed systems or choose a tool that explicitly supports the vehicle’s ABS or airbag modules.
Should I erase a code after reading it?
Only erase it after saving the full scan and addressing the cause, and when there is a reason to clear it. Erasing can remove useful information and reset readiness monitors. It does not repair the fault.
Does a trouble code tell me which part to replace?
No. A code describes a detected condition or system. Confirm the cause with vehicle-specific diagnostic information and suitable checks before replacing parts.
What should I do if the check-engine light is flashing?
A flashing light can signal a serious engine misfire. Reduce driving, stop in a safe place, and arrange professional assistance, especially if the engine runs roughly or power drops.