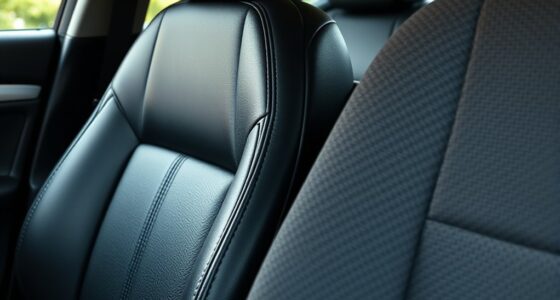

To install car seat covers without wrinkles, start by properly preparing and cleaning your seats. Carefully align the covers, smoothing out wrinkles as you go, and secure all fasteners tightly but not overly tight. Tuck excess fabric into crevices and work from the center outward, adjusting tension evenly for a snug fit. Keep an eye on corners and edges for a smooth, professional look; if you want detailed steps, there’s more you need to know.
Key Takeaways
- Thoroughly clean and dry seats before installation to prevent wrinkles caused by debris or moisture.
- Properly align and smooth the cover from the center outward to eliminate wrinkles during fitting.
- Secure fasteners and ties evenly, adjusting tension gradually to ensure a snug, wrinkle-free fit.
- Use tucking tools or fingers to press fabric into crevices and corners for a smooth, professional appearance.
- Regularly check and re-tighten ties and fasteners during installation to maintain a wrinkle-free finish.

WATERCARBON Tools126 Auto Parts Industries Straight Hog Ring Upholstery Installation Kit Pliers Seat Cover Upholstery Hog Rings pack-100-Piece Ring Set
Features simple pliers with vinyl dipped handles
As an affiliate, we earn on qualifying purchases.
As an affiliate, we earn on qualifying purchases.
Prepare Your Vehicle and Seat Covers for Installation
Before installing your new seat covers, it’s important to prepare both your vehicle and the covers themselves. First, consider the seat material, as different fabrics like leather, cloth, or vinyl require specific handling. Check the cover types to ensure they match your seats and are compatible with your vehicle. Lay out all the cover pieces and read the instructions carefully. Make sure the covers are clean and free of dust or debris, which helps prevent wrinkles and fits better. If your covers are new, give them a quick inspection to ensure no damage occurred during shipping. Properly preparing your vehicle and selecting the right cover type based on your seat material makes installation smoother and helps achieve a clean, wrinkle-free finish. Additionally, understanding your electric bike’s horsepower can help you choose the appropriate accessories or modifications for better comfort during installation. Being familiar with home theatre projectors and their features can also be beneficial if you want to upgrade your vehicle’s entertainment system for a more immersive experience. For optimal results, it’s also helpful to test the fit of your covers on a small section before full installation. Taking a few extra minutes to measure your seats accurately ensures a better fit and reduces the chance of wrinkles or misalignment during installation. Moreover, ensuring proper seat coverage helps maintain a sleek appearance and prevents discomfort when seated.

CAR PASS Line Rider Sporty Front Seat Covers,Gray Car Seat Covers Two Front Seats Only, Airbag Compatible,Universal Fit Sedans,Cars,Vans,SUV,Truck(Black and Gray)
SPORTY DESIGN IN RICH AND PERFECT COLORS . Looks gorgeous and feels really nice when driving. Make your…
As an affiliate, we earn on qualifying purchases.
As an affiliate, we earn on qualifying purchases.
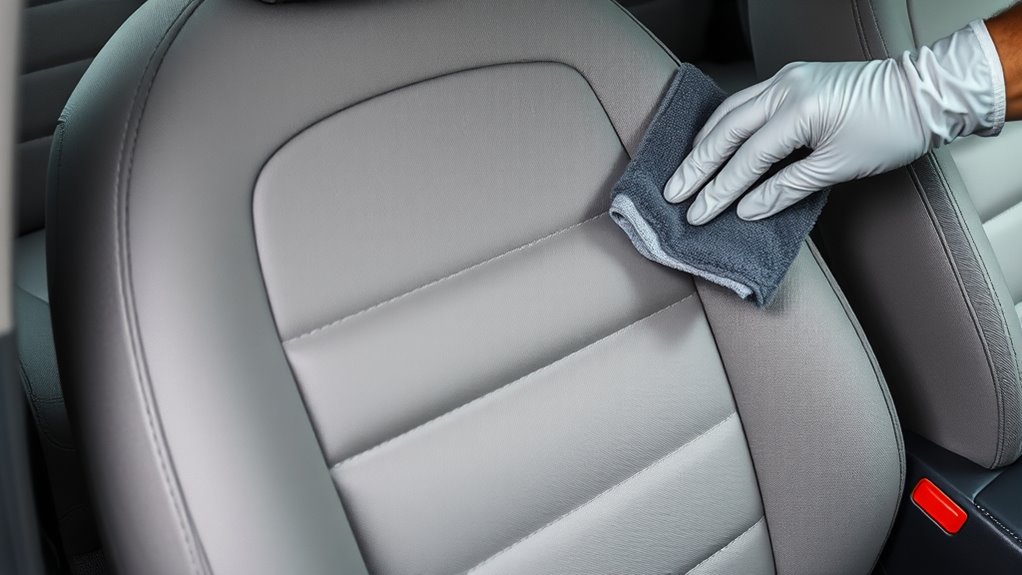
Remove Existing Seat Covers and Clean the Seats

To guarantee a smooth installation process, start by removing any existing seat covers. Carefully lift or unfasten them, paying attention to the fabric material, as some may be delicate or tightly fitted. Once removed, inspect the seat shape to identify any dirt, crumbs, or stains. Use a vacuum to clean thoroughly, reaching into crevices and seams. For fabric material, a fabric cleaner or mild soap and water can remove stains and freshen the surface. If your seats have built-in features like heating elements, ensure they are clean and dry before proceeding. Cleaning the seats properly assures the new cover sits smoothly, minimizes wrinkles, and fits securely, setting the stage for an easy, wrinkle-free installation. Additionally, understanding the importance of consistent storytelling can help you maintain a clear focus on the overall goal of a tidy, well-fitted seat cover. Incorporating proper cleaning techniques ensures that every detail is addressed, allowing the new covers to lay flat and look professional. Proper cleaning also helps in preventing wrinkles, making the installation process much easier and more effective. Being aware of fabric types and care can guide you in choosing the right cleaning methods for different seat materials.

PAULATO BY GA.I.CO. Tucking Tools for Extra-Snug Slipcover Fit – 4 Pack Folding Anti-Slip Cardboards – Fits Covers for Armchairs, Loveseats, Sofas, Recliners, L-Shape & Corner Furniture
EXTRA-SNUG FIT: Keep your slipcovers perfectly smooth and in place. Firm tucking tools prevent shifting for a clean,…
As an affiliate, we earn on qualifying purchases.
As an affiliate, we earn on qualifying purchases.
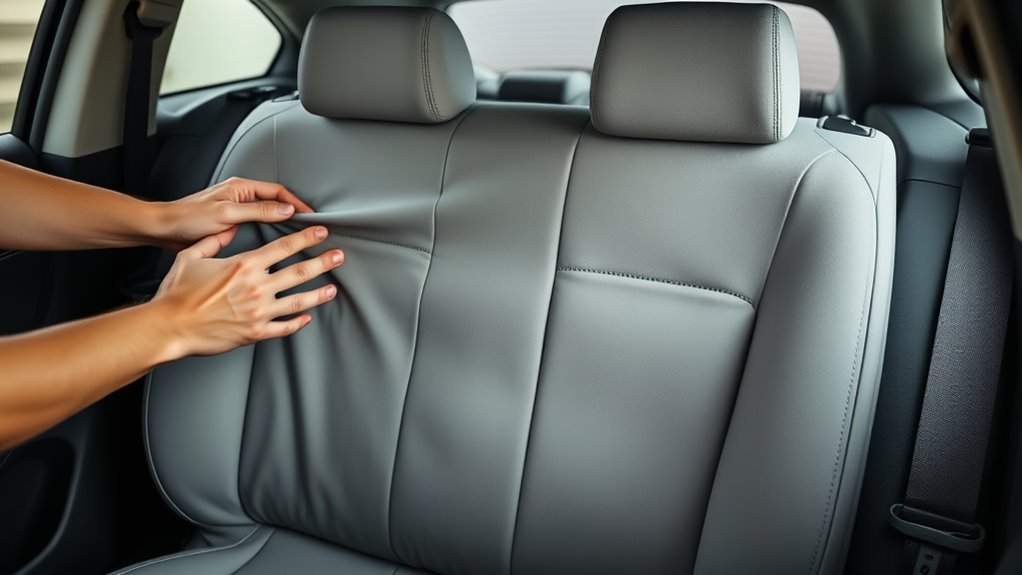
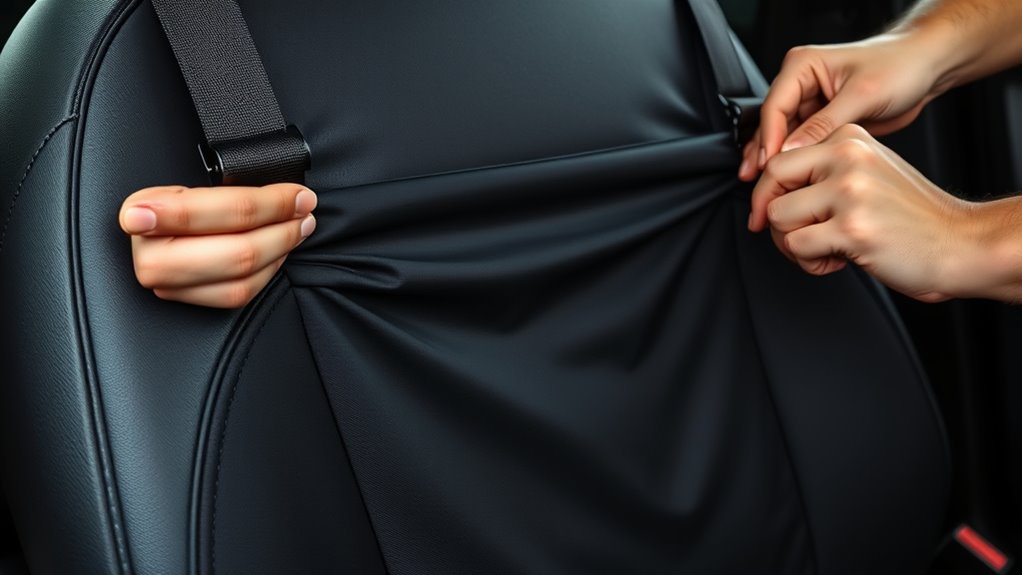
Properly Align the Seat Covers Before Securing Them

Once you’ve cleaned and prepared the seat, carefully drape the new cover over it, ensuring it aligns properly with the seat’s contours. Pay attention to the seat cover materials, as some fabrics are more flexible and easier to adjust than others. Before securing, smooth out wrinkles and adjust the cover so it fits snugly around the edges and corners. Use your installation tools, like tucking tools or plastic pry bars, to help guide the material into tight spots without tearing or stretching the fabric. Proper alignment is essential to prevent wrinkles and bunching later. Take your time to ensure every part of the cover lines up perfectly with the seat’s shape, so it looks professional and feels comfortable once secured. Incorporating visual cues can also assist in achieving a smooth, wrinkle-free installation. Paying close attention to fabric flexibility can make the adjustment process easier and more effective. Additionally, considering proper securing techniques can help maintain a wrinkle-free appearance over time. Being mindful of the seat shape variations can influence how well the cover fits, so tailoring your approach accordingly can yield better results. Using proper cleaning methods before installation helps ensure the cover adheres correctly and stays in place longer.

Moicstiy 24Pcs Car Seat Cover Plum Plate Metal Hooks, 12Pcs Plastic Car Seat Covers Chucks and 12Pcs Metal Hooks Set Locking Clip Plastic Card Fixed Fastener Buckle Replacement for Car Seat (Black)
What You Get: 12Pcs plastic car seat covers chucks and 12pcs metal hooks. Chuck diameter is 67mm/ 2.65inch,…
As an affiliate, we earn on qualifying purchases.
As an affiliate, we earn on qualifying purchases.
Use Fasteners and Ties to Achieve a Snug Fit
To make certain your seat cover fits securely, start by adjusting the fastener tension so it’s snug but not too tight. Make sure you secure all ties properly, keeping the cover smooth and in place. Regularly check the fit to prevent shifting or looseness over time. Incorporating responsive fit adjustments can help ensure the cover remains properly aligned as the seat or cover shifts with use. Additionally, ensuring the cover is properly secured and tensioned from the start can reduce the need for frequent readjustments. Paying attention to the correct installation techniques can also help maintain a wrinkle-free appearance over time, especially when combined with proper tensioning methods. Recognizing the importance of piercing care and hygiene can also be beneficial for overall maintenance and longevity of the fit.
Adjust Fastener Tension
Ensuring a snug fit starts with adjusting the fastener tension properly. To do this, tighten or loosen the fasteners until the cover sits firmly against the seat without sagging or bunching. Focus on the tension adjustment to eliminate wrinkles and guarantee a smooth appearance. Check each fastener or tie, applying consistent pressure to achieve even tension across the cover. Avoid overtightening, which can cause puckering or damage, or under-tightening, which leaves slack and wrinkles. Continuously test the fit as you make adjustments, ensuring the cover remains taut but not overly tight. Proper tension adjustment guarantees the cover stays in place during driving, providing a clean look and maximum comfort. Incorporating the right fasteners and ties can significantly improve the overall fit and durability of your seat cover. Being aware of the pinball machine weight can help in selecting the appropriate installation tools and methods for heavier covers. Additionally, understanding the biography of Cote De Pablo can offer insights into maintaining comfort and aesthetic appeal in your vehicle’s interior. Using the correct installation techniques ensures long-lasting results and a professional finish.
Secure Ties Properly
After adjusting the fastener tension, the next step is to secure the ties properly. Proper tie placement ensures a snug fit and prevents wrinkles. Start by positioning ties evenly along the seat cover edges, avoiding bunching or slack. Use the tension adjustment to tighten each tie just enough to hold the cover securely, but not so tight that it causes puckering. When securing ties, keep in mind these tips:
- Distribute tension evenly across all ties
- Pull ties firmly to eliminate slack
- Avoid over-tightening to prevent damage
- Check each tie’s placement for a smooth finish
- Double-check tension after initial securement
- Proper tension management is key to preventing damage and ensuring a tight fit. Maintaining consistent tension prevents wrinkles and extends the life of your seat cover. This approach will help you maintain a tight, wrinkle-free fit, giving your seat cover a sleek look and exemplary comfort.
Check Fit Regularly
How can you make sure your seat cover stays snug and wrinkle-free over time? Regularly checking the fit guarantees the fasteners and ties remain secure, preventing sagging or bunching. As seat cover materials settle or shift, re-tighten straps and fasteners to maintain a smooth appearance. Keep seat belt compatibility in mind—adjust covers so they don’t interfere with seat belt operation or safety features. Use a simple checklist to monitor fit:
| Aspect | What to Check |
|---|---|
| Fasteners & Ties | Are they tight and secure? |
| Seat Belt Compatibility | Does the cover allow full seat belt movement? |
| Material Fit | Any wrinkles or looseness? |
| Overall Appearance | Is it smooth and snug? |
Consistent checks keep your seat cover looking fresh and secure.
Smooth Out Wrinkles During Installation

To achieve a smooth, professional look, it’s important to carefully smooth out wrinkles as you install the seat cover. Use techniques like mathematical smoothing, which involves evenly distributing tension, and fabric stretching to reduce puckers. Keep the following tips in mind:
- Pull the fabric gently but firmly, avoiding overstretching.
- Work from the center outward to flatten wrinkles.
- Use your hands or a soft cloth to smooth areas thoroughly.
- Adjust tension periodically to prevent creases.
- Keep the fabric taut but not tight, ensuring even coverage.
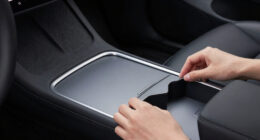
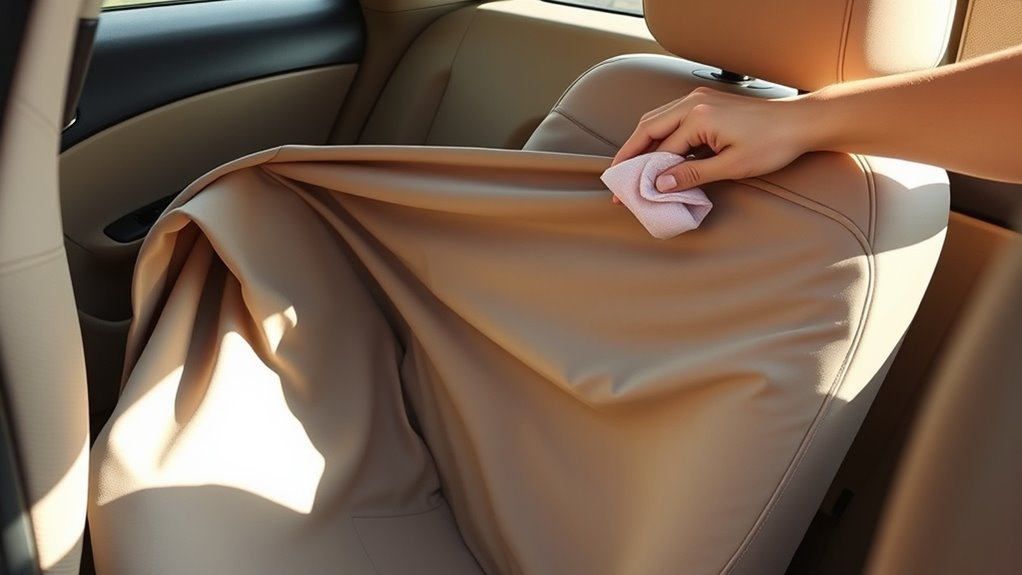
Adjust and Tuck Excess Fabric for a Clean Finish
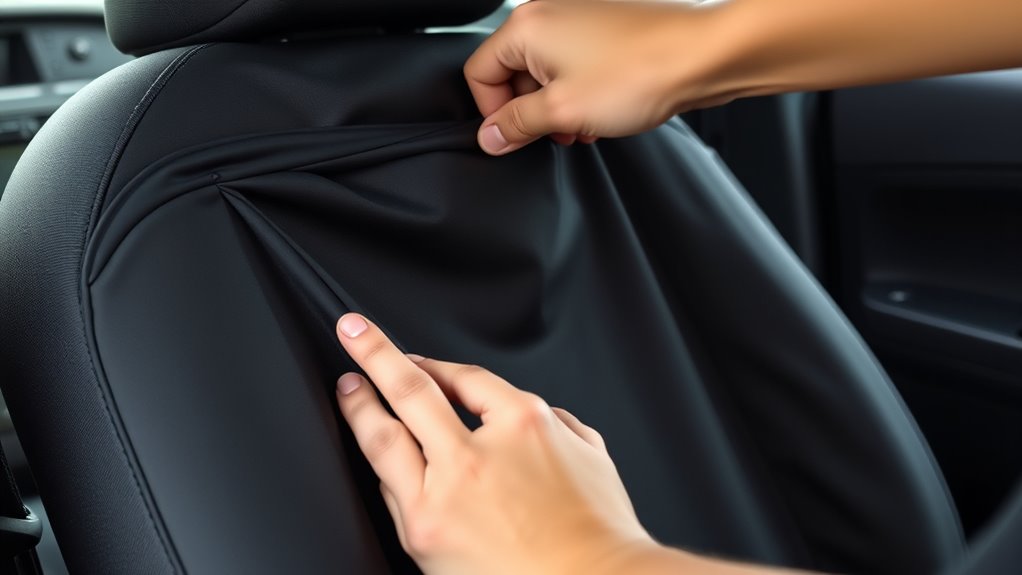
Once you’ve smoothed out the wrinkles, it’s important to adjust and tuck any excess fabric for a neat, professional look. Focus on maintaining proper fabric tension across the seat and ensuring the edges are tucked securely. Start by pulling gently on the fabric to eliminate slack, then tuck the edges neatly under the seat or side panels. Use your fingers or a flat tool to press the fabric firmly into crevices, creating a smooth surface. Proper edge tuck prevents loose fabric from shifting or bunching over time. Here’s a quick overview:
| Step | Action | Tip |
|---|---|---|
| Check fabric tension | Pull evenly across surface | Avoid overstretching |
| Identify excess fabric | Locate loose areas | Focus on corners and edges |
| Tuck edges | Fold fabric under seat | Secure with hand or tools |
| Smooth fabric | Press into crevices | Maintain tension |
| Final adjustment | Ensure neat fit | Re-tuck if needed |
Final Inspection and Minor Touch-Ups for a Wrinkle-Free Look
Now, take a close look at your seat covers and make certain any remaining wrinkles with small adjustments. Check for loose areas or gaps that could cause discomfort or bunching over time. Addressing these minor touch-ups ensures a smooth, professional finish.
Secure Wrinkles With Adjustments
After installing your car seat cover, take a moment to carefully inspect the entire surface for any remaining wrinkles or loose areas. To secure a smooth, professional look, focus on tension adjustment and wrinkle prevention. If you notice stubborn wrinkles, gently pull the fabric and tighten the cover where needed. Smooth out any creases by hand, working from the center outward. Use these tips to perfect your fit:
- Adjust tension straps for a snug fit
- Push fabric into corners and edges
- Re-tighten straps if needed
- Use gentle pressure to smooth wrinkles
- Double-check for even tension across the cover
Check for Loose Areas
Have you thoroughly checked your seat cover for loose areas or uneven spots? It’s essential to ensure the cover fits snugly to maintain seat belt safety and seat cushion comfort. Gently press down on different sections to identify any slack or bunching. If you find loose fabric, make minor adjustments by re-tucking or smoothing the material, ensuring it’s evenly distributed. Double-check that the seat belt latches smoothly without obstruction, which can be affected by loose covers. Also, verify that the cover doesn’t shift during normal use, which could cause discomfort or safety issues. Taking these final steps guarantees a wrinkle-free appearance and keeps your seat safe and comfortable. Properly secured covers enhance both the look and function of your car seat.
Frequently Asked Questions
Can I Install Car Seat Covers on Heated or Cooled Seats?
Installing car seat covers on heated or cooled seats is possible, but you need to be careful. Think of it like applying a blanket to a hot stovetop—you don’t want to cover the heat source directly. Make sure the seats are cool or warm enough, and choose breathable, heat-resistant covers. Avoid blocking vents or sensors, and always follow the manufacturer’s instructions to prevent damage to your heated or cooled seats.
Are There Specific Seat Covers for Leather Versus Fabric Seats?
Yes, you should choose seat covers designed for either leather or fabric seats. Leather compatibility is essential if you have leather seats; look for covers made with materials that won’t damage or stick to leather. For fabric options, select covers that fit snugly without slipping. Always check product descriptions to verify they’re suitable for your seat type, guaranteeing a perfect fit and durability without wrinkles or discomfort.
How Do I Prevent New Seat Covers From Slipping Over Time?
To keep your seat covers from slipping, you need to focus on securing the fit. Use seat covers with non-slip backing to grip the seat surface, and adjust the tension properly during installation. Tighten the straps and elastic edges to ensure a snug fit, preventing movement over time. Regularly check and re-tighten the seat cover tension, maintaining stability so your covers stay in place, look fresh, and feel secure.
Can I Wash or Clean My Seat Covers After Installation?
Yes, you can wash your seat covers after installation if they are washable seat covers. Always check the manufacturer’s instructions first, as some covers require hand washing or air drying. Regular seat cover cleaning helps maintain their appearance and hygiene. Remove the covers carefully, follow the recommended cleaning method, and guarantee they’re completely dry before reinstalling to keep them looking fresh and prevent wrinkles.
What Tools Are Recommended for Tightening Fasteners Securely?
Think of tightening fasteners like tuning a guitar—precision is key. Use tension tools specifically designed for fastener clips to make sure they’re snug but not over-tightened. These tools give you the leverage and control needed to secure your car seat covers properly. Secure fastener clips firmly, then double-check each one. Proper tension prevents wrinkling and shifting, giving your seat cover a smooth, professional finish that lasts.
Conclusion
Now that you’ve followed these steps, your seat covers should look flawless. But don’t rush to admire your work just yet—there’s one last secret trick to make certain those wrinkles stay gone for good. Ready to reveal the final touch that guarantees a perfectly smooth finish? Stay tuned, because the last move could make all the difference. When you do it right, your car’s interior will look stunning—wrinkle-free and professionally installed—every time.