This guide helps students assemble a simple, effective car care kit and use it to perform basic vehicle maintenance and cleaning. Perfect for beginners, it covers essential tools and steps to keep a car looking good and running safely. Expect to spend about 30 to 45 minutes completing the setup and initial use.
Difficulty: Beginner | Time: 30-45 minutes
What You’ll Need
Tools & Materials:
- Car care products (interior and exterior cleaner), microfiber cloths, sponge or soft scrub brush, vacuum cleaner (handheld or portable), tire pressure gauge, small bucket, brush or wheel cleaner, trash bag
Knowledge:
- Basic understanding of car parts and cleaning routines
Gather all tools before starting. Choose car care products suitable for your vehicle’s paint and interior materials. Wear gloves if desired to protect skin from chemicals.
As an affiliate, we earn on qualifying purchases.
Before You Start
Ensure the car is parked in a shaded, flat area. Check that the vehicle is turned off and cooled down to prevent burns or accidents during cleaning. Read the labels on cleaning products to understand their proper use and safety precautions. Collect all tools and supplies in one accessible location.
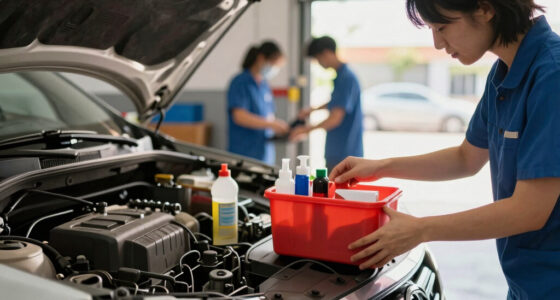
interior and exterior car cleaning kit
As an affiliate, we earn on qualifying purchases.
As an affiliate, we earn on qualifying purchases.
Step-by-Step Instructions
Step 1: Gather all tools and supplies
Collect every item listed in the tools section and lay them out on a clean surface near your car. This ensures quick access during the process and prevents missing any essential items.
Tip: Organize tools in a small bin or caddy for easy transport around the vehicle.
Check: All tools and supplies are accounted for and within reach.
Step 2: Inspect tire pressure and inflate if needed
Use the tire pressure gauge to check each tire’s pressure. Compare with the recommended pressure found in your vehicle’s manual or door sticker. Inflate tires to the recommended PSI if necessary.
Tip: Avoid over-inflation; do it gradually and check pressure frequently.
Check: Tires are at the correct pressure, confirmed by the gauge.
Step 3: Remove trash and debris from interior
Use a trash bag or container to collect any wrappers, papers, or loose items inside the vehicle. Clear out all clutter for a cleaner interior.
Tip: Check under seats and in door pockets for hidden trash.
Check: Interior is free of trash and clutter, visibly cleaner.
Step 4: Vacuum the interior
Use a handheld or portable vacuum to clean the floors, seats, and carpets. Pay special attention to corners, under seats, and door pockets.
Tip: Use nozzle attachments for tight spots and upholstery tools for seats.
Check: Seats and floors are visibly free of dust, dirt, and debris.
Step 5: Clean windows and mirrors
Spray a glass cleaner on the interior and exterior windows and mirrors. Wipe with a microfiber cloth until streak-free.
Tip: Use a different cloth for interior and exterior to avoid transferring dirt.
Check: All glass surfaces are clear and streak-free.
Step 6: Wash the exterior
Rinse the car with water to remove loose dirt. Apply exterior car cleaner or soap with a sponge or soft brush, working from top to bottom. Rinse thoroughly and dry with microfiber towels.
Tip: Use a separate bucket for clean water and soapy water to prevent re-contaminating your sponge.
Check: Car surface is clean, shiny, and free of dirt or soap residue.
Step 7: Check and adjust tire pressure again
Recheck the tire pressure after washing to ensure no pressure loss occurred. Adjust if necessary.
Tip: Do this in a shaded area to prevent inaccurate readings caused by heat or cold.
Check: Tires are at the correct pressure, verified with the gauge.
Step 8: Apply interior protectant or quick detail spray
Spray an interior protectant or quick detail spray on plastic, vinyl, or leather surfaces. Wipe with a microfiber cloth to restore shine and protect surfaces.
Tip: Test a small area first to check for compatibility.
Check: Interior surfaces look refreshed and feel clean, with no sticky residue.
As an affiliate, we earn on qualifying purchases.
Common Mistakes to Avoid
- Using harsh chemicals on car paint or interior surfaces — Use products specifically formulated for automotive use and follow label instructions.
- Over-wetting interior carpets or seats — Use minimal moisture and ensure proper drying to prevent mold and odors.
- Neglecting to check tire pressure after washing — Always verify tire pressure after any maintenance to ensure safety and proper performance.
- Using dirty or abrasive cloths for cleaning — Use clean microfiber cloths and soft brushes to prevent scratching paint or interior surfaces.
As an affiliate, we earn on qualifying purchases.
Troubleshooting
Problem: Car exterior still looks dirty after washing
Solution: Repeat the washing process, ensuring thorough rinsing and scrubbing of stubborn spots.
Problem: Tires lose pressure quickly after inflation
Solution: Check for leaks or punctures and consider sealing or repairing the tire before reinflating.
Problem: Interior still dusty after vacuuming
Solution: Use a damp microfiber cloth to wipe surfaces or focus on missed areas with the vacuum.
Problem: Glass still streaky after cleaning
Solution: Use a clean, dry microfiber cloth and a streak-free glass cleaner, wiping in straight lines.
What Success Looks Like
The car is visibly clean inside and out, with shiny, streak-free windows; properly inflated tires; a clutter-free interior; and a fresh, protected surface appearance.
Next Steps
Schedule regular cleaning sessions every 2-4 weeks. Recheck tire pressure monthly. Replace or upgrade tools and products as needed. Consult your vehicle’s manual for specific maintenance tips.
Frequently Asked Questions
Can I use household cleaning supplies on my car?
Avoid household cleaning products like dish soap or abrasive cleaners, as they can damage paint and interior surfaces. Use products designed for automotive care.
How often should I wash my car?
Wash your car every 2-4 weeks to maintain appearance and protect the paint. Increase frequency if exposed to harsh weather or road salt.
Is it safe to wash my car in the driveway?
Yes, but use biodegradable soap and avoid spilling chemicals onto grass or drains. Consider using a designated washing area or car wash facilities for environmental safety.
Can I do this cleaning on a rainy or very hot day?
Preferably avoid very hot days to prevent soap and water from drying too quickly, causing streaks. Rainy days can be fine if you dry the car promptly afterwards.